Wednesday, August 7, 2013

Honey Jalapeno Cornbread


I have made cornbread many times and this one is by far my favorite. It's sweet and moist with just a bit of heat and flavor from the honey and jalapenos. I made collard greens and wanted some cornbread with them so I searched for jalapeno cornbread recipes since I had two leftover in my fridge.
I saw iowagirleats recipe on Pinterest and modified it. Thank you Iowa girl for the recipe. I loved it. She uses unsweetened apple sauce but I used regular apple sauce which is what I had. Therefore, I may reduce the sugar next time to be more savory and less sweet but it was delicious the way it was. I didn't have butter either so I used olive oil and it turned out just fine and moist. I plan to just use olive oil next time too. Also since I used regular apple sauce it was already sweet enough that we didn't need more honey to drizzle


Ingredients:
1/4 cup olive oil
1/4 cup applesauce
1/4 cup sugar (will reduce or omit this next time)
1/4 cup honey
2 jalapenos, seeded and diced
2 eggs, beaten
1 cup low-fat buttermilk ( I used 1 TBS lemon juice and fill up one cup with whole milk )
1 cup cornmeal
1 cup flour
1/2 teaspoon salt
1/2 teaspoon baking soda
Directions: 
  1. Preheat oven to 375 degrees. Spray an 8×8 or equivalent sized baking dish well with nonstick spray then set aside. In a large bowl, whisk together olive oil and applesauce. Add sugar and honey then whisk to combine.  Add eggs and buttermilk (or sour milk) then whisk to combine.
  2. In a separate bowl, stir together cornmeal, flour, salt, and baking soda. Whisk into dry ingredients in two batches. I took some batter out to make a mild version the added jalapeno to the rest of the batter.
  3. Pour mixture into prepared baking dish then bake for 30-35 minutes, or until a toothpick inserted into the center comes out clean.


 Below is a non spicy version in cute littles ramekins I made before I added jalapenos for my baby girl so it wont be too hot for her. She loved them. They were only in the oven for about 22 minutes since they were smaller and baked faster.


Monday, August 5, 2013

Homemade Fig Preserves


Figs are truly a rare treat whether you enjoy them fresh or preserved. There are so many varieties of figs and I am not sure what kind of figs my in laws have but I was lucky enough to receive tons and tons of figs this year from their tree. They are greenish on the outside with pink flesh inside. We had fun picking them before the birds get to them. I made several jars of preserves to keep and to give away.


Fig Preserves Recipe

Makes 3-4, 8 oz jars

Prep time 35-40 minutes
Cook time about 1 1/2 hour
  • 8 Cups whole fresh figs
  • 2 tsp baking soda
  • 2 Cups granulated sugar
  • 1tsp minced ginger or powder
  • 1/2 tsp cinnamon
  • 1/2 tsp vanilla extract 
  • Zest and juice from 1 Lemon
  • Hot tap water
Directions:

  • Dissolve the baking soda in hot tap water, and gently stir to wash the figs in it.
  • Then rinse the figs thoroughly with fresh cool water. 
  • Slice figs in half. (leave whole for whole fig preserves)
  • In a large stock or canning pot, combine figs, sugar, lemon juice, lemon zest, ginger and 1 cup hot tap water bring to a boil stirring frequently. ( I used a Dutch oven)
  • Note: if using whole fruit gently stir in order no to break fruit.
  •  Reduce heat and continue cooking until mixture is thick and gooey. (about an hour)
  • I also cut the figs more while they are still in the pot with shears towards the end to get smaller pieces.
  • Add cinnamon and vanilla in the last 20 min of cooking.
  • Watch closely in the last few minutes to keep bottom from burning
  •  Fill sterilized jars with hot preserves leaving 1/4 inch head space and cover with clean tops and rims cook in a hot water bath for 15 minutes. Follow manufacturer's canning instructions for more details in canning. 
  • Open jars can be kept up to a month in the refrigerator.


The fun part now that I have all the preserves in the jars is to decorate and give them as gifts. These make great gifts and many people love fig jam. I used brown paper, some pretty scrap booking paper and bakers twine to decorate the jars. My daughter helped me with the decorating part and we had a great time.


I enjoy my preserves on a piece of toasted crusty rustic bread with some mascarpone or cream cheese. It should be yummy on a bagel or on an english muffin as well. How about on pizza with some goat cheese? I will have to try that soon.

Monday, July 29, 2013

Pretty Beet Terrine


Beets are becoming more and more popular these days in many gourmet or new American  restaurants. I was introduced to beets in the form of juice last year and loved them ever since. Roasted beet salad is one of my favorite things to eat and I have been making it often. This time I wanted to try a different recipe to use up the beets I bought from a farmers market. As usual I saw some great ideas on Pinterest and I decided to make a beet terrine. I came up with the following recipe after reading other beet terrine recipes and looking at what ingredients I  had in my fridge. 

Some people have never eaten beets and this terrine may not be for everyone but it sure is a very pretty appetizer loaded with nutrients that are great for your body such as iron and antioxidants.


Ingredients :

3 red beets
2 golden beets
4oz soft goat cheese
4 oz mascarpone cheese
1 tsp honey
Salt & pepper
Honey & olive oil to drizzle
Basil leaves for garnish

Directions:

Pre heat the oven to 400 degrees. Wash and peel the beets, then wrap them individually in foil. Place on a baking sheet and roast for 30-40 min till tender but not mushy so you can still slice thinly.

Meanwhile, mix the cheeses with 1 tsp of honey to obtain a smooth paste. This is going to be your glue between the beet slices. 

Once the beets are roasted and cooled, slice them thinly (about 1/8 inches) using a very sharp knife. 

In a loaf pan or container of your choice lined with plastic wrap, start layering beet slices starting with the golden ones then cheese paste sprinkling salt and pepper in between. Repeat the layering ending with the red beets.

Cover with plastic wrap and refrigerate over night. Also place some kind of weight on top to press on your beets and help the terrine set and firm up. 

When you are ready to serve the beet terrine, remove the block of beets from the pan using the plastic to lift. Then slice the terrine. 

Drizzle with honey and olive oil ( I used lavender infused olive oil ). Also, if available, thin basil leaves strips  sprinkled on top will not only add color but also add flavor that goes well with this beet terrine. 


Hope you try this pretty terrine and enjoy it. It is not hard to make yet the end result looks like you spent hours trying to get this beautiful terrine.


Wednesday, July 17, 2013

Southern Peach Cobbler


Its summer time and peach season. My wonderful neighbor and friend went to a local orchard and brought back some super sweet peaches for me. I turned to the world of Internet and stumbled upon this yummy peach cobbler recipe from Allrecipes. I like this recipe better than the Paula Dean's I used before. The peaches I had were small peaches so I used 10 instead of eight. Next time I do want to add a few more peaches to get more fruit filling since it cooked down as it baked.

I do think that the peaches you use make a big difference. I have now been spoiled with the delicious TX peaches from Ham Orchard in Terrell, TX and don't want to ever eat store bought or can peaches again!
Also vanilla ice cream is a must to go with your warm peach cobbler. I will save the homemade vanilla ice cream recipe for another post.


Here is the recipe:

Ingredients:

8 big fresh peaches - peeled, pitted and
sliced into thin wedges
1/4 cup white sugar
1/4 cup brown sugar
1/4 teaspoon ground cinnamon
1/8 teaspoon ground nutmeg
1 teaspoon fresh lemon juice
2 teaspoons cornstarch

Topping

1 cup all-purpose flour
1/4 cup white sugar
1/4 cup brown sugar

1 teaspoon baking powder

1/2 teaspoon salt
6 tablespoons unsalted butter, chilled and
cut into small pieces
1/4 cup boiling water

Mix together:
3 tablespoons white sugar
1 teaspoon ground cinnamon


1. 


Directions:

Preheat oven to 425 degrees F (220 degrees C).
2.In a large bowl, combine peaches, 1/4 cup white sugar, 1/4 cup brown sugar, 1/4 teaspoon cinnamon, nutmeg, lemon juice, and cornstarch. Toss to coat evenly, and pour into a 2 quart baking dish. Bake in preheated oven for 10 minutes.
3.Meanwhile, in a large bowl, combine flour, 1/4 cup white sugar, 1/4 cup brown sugar, baking powder, and salt. Blend in butter with your fingertips, or a pastry blender, until mixture resembles coarse meal. Stir in water until just combined.
4.Remove peaches from oven, and drop spoonfuls of topping over them. Sprinkle entire cobbler with the sugar and cinnamon mixture. Bake until topping is golden, about 30 minutes.

Monday, July 1, 2013

Fresh Basil Pesto Pasta

Fresh Basil Pesto

Every year I have basil plants in my garden that reseed themselves and come back. I went out to my garden and picked fresh basil leaves and made this simple and delicious pesto. Pine nuts are pricey but you only need a little bit and won't break your bank. Also, you can substitute with walnuts or macadamia nuts. I have different kinds od basil plants and I used a variety of basil such as sweet basil, Thai basil. 

I got this recipe from the post of Elise Bauer from simplyrecipes.com. I made hardly any changes to the recipe.

INGREDIENTS

  • 2 cups fresh basil leaves, packed
  • 1/2 cup freshly grated Parmesan-Reggiano or Romano cheese
  • 1/2 cup extra virgin olive oil ( I used a little more ..3/4 cup instead)
  • 1/3 cup pine nuts or walnuts (Macadamia nuts also yummy)
  • 3 medium sized garlic cloves, minced
  • Salt and freshly ground black pepper to taste
  • Special equipment needed: A food processor 

METHOD

1 Combine the basil in with the pine nuts, pulse a few times in a food processor. (If you are using walnuts instead of pine nuts and they are not already chopped, pulse them a few times first, before adding the basil.) Add the garlic, pulse a few times more.
2 Slowly add the olive oil in a constant stream while the food processor is on. Stop to scrape down the sides of the food processor with a rubber spatula. Add the grated cheese and pulse again until blended. Add a pinch of salt and freshly ground black pepper to taste.
Serve with pasta, or over baked potatoes, or spread over toasted baguette slices.

Yield: Makes 1 cup. 

Pesto Pasta with Grilled Chicken


The above pasta dish is so simple and quick, I had to share! 

Just toss some cooked and drained pasta with the fresh pesto. Throw some grilled chicken or shrimp on top and ENJOY!!


Tuesday, June 4, 2013

Thai Coconut Sticky Rice and Mango ข้าวเหนียวมะม่วง


For most Asian families, it is common to have fruits at the end of a meal as desert. I grew up eating fruits as desert often and this is one my favorite Asian sweet treats with fruit! Being Asian and a rice lover, I can't get enough of this simple Thai desert consists of yummy sticky rice soaked with sweet aromatic coconut milk, and topped with a very tropical fruit, mango. What a Genius idea to put all the very common ingredients of the tropical South East Asia together in a sweet way.

The recipe I use is below and it is easy to follow. It is also from one of my favorite Thai food blogs so check it out!

Recipe:

Author: 

Prep time:  
Cook time:  
Total time:  
Serves: 2
Ingredients
  • ½ cup raw Thai sticky rice (no substitute), soaked for 10 minutes, drained, and rinsed to get rid of excess starch ( I soak my rice for at least 2 hours)
  • ½ cup good coconut milk
  • ½ cup sugar
  • ½ teaspoon salt
  • One perfectly ripe good mango (preferably Ataulfo), peeled and cut into thick slices
Directions
  1. Put the rice in a heatproof bowl and steam in a steamer, over medium heat, for about 20 minutes (based on one half cup of rice). The rice should be cooked through with no hard, raw bits in the middle of the grains. You can also cook the sticky rice without a steamer, using the splatter guard method.
  2. Turn off the heat and let the rice stay in the steamer, with the lid on, while you prepare the coconut milk.
  3. In a heatproof bowl, heat the coconut milk, sugar, and salt in the microwave on high for 2 minutes. The sugar should completely dissolve and the mixture should be very hot.
  4. Take the sticky rice out of the steamer. Pour the hot coconut mixture on top of the rice and gently stir. (It may look like your rice is drowned in coconut water, but the liquid will all be absorbed.) Cover the bowl tightly with plastic wrap and let the mixture stand at room temperature, undisturbed, for half an hour.
  5. The coconut sticky rice is to be served at room temperature along with fresh mango. The sesame seeds are optional.
  6. The rice can be refrigerated and reheated in the microwave, but the texture of reheated sticky rice isn’t as good as it is when freshly made. Freezing sticky rice is not recommended.
It is really best served warm after making it rather than re heated.


Tuesday, February 19, 2013

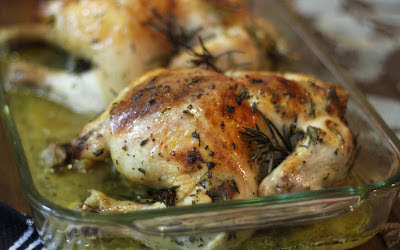
Lemon Rosemary Chicken


This is such an easy dish to make. My family loves it and I love making it for them. I also have a huge bush of rosemary which makes it easier for me. No brining needed and it is juicy and delicious. I made two tonight since my family needs more than one!
Please feel free to try out the recipe below and let me know how it turns out for you.


Ingredients

1( 3-4 lb) chicken (fresh, never been frozen)
1 lemon
4-6 sprigs of fresh rosemary
4 cloves of garlic, peeled 
1-2 TBS olive oil
salt and peeper to taste (or you can use lemon pepper)
1/4 C water

Preheat the oven to 350 degrees.

Finely dice about 1 TBS rosemary and save the rest.
In a small bowl, squeeze 1 lemon (save the rind), add olive oil and diced rosemary. Mix well.
Rub the whole chicken with salt and pepper (or lemon pepper). Then rub again with lemon oil mixture.
Insert whats left of the lemon (the rind) inside the chicken cavity along with some rosemary sprigs and a garlic clove. Then place the rest of the rosemary sprigs and garlic in various parts of the chicken such as under the wings etc.
Place the chicken in a pan with 1/4 C water and bake uncovered for 1 hour 15 min, breast side down. Let it rest for 10-15 minutes before eating the whole thing!!