Showing posts with label Daring Kitchen. Show all posts

Wednesday, September 14, 2011

Galbi Tang ( Korean Beef Short Rib Soup): The Daring Cooks’ September 2011 Challenge


Peta, of the blog Peta Eats, was our lovely hostess for the Daring Cook‟s September 2011 challenge, “Stock to Soup to Consommé”. We were taught the meaning between the three dishes, how to make a crystal clear Consommé if we so chose to do so, and encouraged to share our own delicious soup recipes!

Being a soup lover, this challenge gave me so many ideas of what I wanted to make. I picked this Korean Beef Short Rib Soup because my family requested it and also I found a great deal on the short ribs.
I am not Korean but I LOVE Korean food and learned to make many Korean dishes mainly from blogs, sometimes friends and from eating out. Galbi Tang is simple to make if you have some time to make the stock and let the beef become tender. Tang in Korean means soup. This website lifeinkorea has a great list of Korean soups, the meanings, and even how to eat them.

Wiki also has some good information on this dish including how to prepare too.

Here is how I make mine.

Ingredients


2 LB Beef Short Ribs (in big chunks)
1 Large Onion
5 Garlic Cloves
1 TBS whole Black peppercorns
1 tsp salt
5 Green Onions (white part only)
1 6 inch piece of Daikon Radish
2 eggs

Seasonings for the Beef:

2 TBS Light Soy Sauce
1TBS Ground Toasted Sesame Seeds
1 tsp Sesame oil
1 TBS Minced Garlic

Garnish:
chopped green Onions
Sesame seeds

To get rid of some blood from the bones, soak the ribs in a cold water for at least 1hours changing the water a couple times.

Place the ribs in a pot and cover with new cold water and boil vigorously for 5 minutes. There will be scum /foam on the top. Remove the pot from the heat and strain the ribs. Wash the pot and the ribs so there is no more scum.

Place the clean pieces of beef back in the clean pot and fill the pot with 10-12 cups of water. Add salt, Daikon Radish, onion, green onions, peppercorns, and whole cloves of garlic.

Bring to a boil, and then simmer over low heat till the meat it tender ( about 2-3 hours. You want the meat to be falling off the bones when you eat. Must simmer over low heat or the stock will be cloudy. )

After about an hour, take the radish out and slice the radish and keep aside to put back into the soup later.

When the meat is tender, strain the meat and veggies. Discard the veggies. Season the meat with seasonings above.

Let the stock cool in the fridge for several hours or overnight so the fat will come up to the top and you can skim and throw away the fat. This step is necessary to obtain a good Galbi Tang that is not oily. If you are in a hurry, you can also scoop out the oil that comes up to the top as much as you can.

Bring the broth back to a boil along with Daikon and seasoned meat when ready to eat.

If everyone likes eggs in your soup, crack the eggs directly into the boiling broth before serving and break the egg up in the pot. Otherwise, you can make a thin omelet, slice it up and add that to the individual bowls.

Sprinkle with green onions and sesame seeds. Serve very hot with rice. Hope you have yummy kimchi to go with it too!

Sunday, May 15, 2011

Chicken and Sausage Gumbo: The Daring Cooks’ May 2011 Challenge


Our May hostess, Denise of There’s a Newf in My Soup!, challenged The Daring Cooks to make Gumbo! She provided us with all the recipes we’d need from creole spices, homemade stock and Louisiana white rice, to Drew’s Chicken & Smoked Sausage Gumbo and Seafood Gumbo from My New Orleans: The Cookbook, by John Besh.

I am so glad that this month challenge is GUMBO because I love LOVE soups and stews, and gumbo is one of my top favorites. I like seafood gumbo as well but I think I make a better chicken gumbo than seafood so this is what I often make, especially in the cold months. Sometimes I make a huge pot to eat some and freeze some.

Gumbo, in my opinion, is not hard to make and one should not be discouraged after seeing the long list of ingredients. However, it does take some patience to make a good roux and some time to chop up the veggies and get the chicken ready etc. There are other options to speed up the process if you choose to. For instance, instead of making homemade chicken broth and shredding your chicken, use boneless skinless chicken breast or store bought rotisserie chicken and box chicken broth. There are also jars of roux you can buy if you do not want to make roux but I enjoy making everything from scratch so I just pick a day that I have time and make this yummy pot of gumbo.

Feel free to tweak the recipe according to your taste. For instance, add more or less veggies or hot sauce or omit anything that you do not have or like. You can make a thicker gumbo if you make more roux by increasing the flour and oil. (Just keep a 1:1 ratio). Add more stock for a thinner gumbo. Some file powder can be sprinkle at the end into the pot or in the bowl before eating.


Okra is optional even though some say it is not gumbo unless okra is in it. (Tip: some say that if you sauté the okra in a little bit of oil before adding into the pot will make it not so slimy. I just add the chopped okra as is.)In my opinion, there are no rules and it’s all about your taste!

So enjoy it how YOU want it!

Ingredients:

1 whole chicken, about 3-4 lbs
1 lb smoke sausage
½ Cup All Purpose Flour
½ cup canola oil
1 large onion
3 stalks of celery
1 green bell pepper
1 red bell pepper
1 Cup chopped fresh or frozen okra (optional)
2 cloves garlic, minced
1 bay leaf
1 tsp cayenne pepper
1 TBS Worcestershire sauce
1 TBS Tabasco sauce
1 TBS soy sauce
Salt and peeper to taste
Steamed rice to serve with

Rinse and pat dry the chicken. In a large stock pot, place the whole chicken and rub some salt and pepper onto the chicken. Cover the chicken with cold water and boil on low to medium heat till the chicken is tender, for about 1 hour.


Strain the chicken and reserve the stock. Remove skin and bones from the chicken and shred or chop the chicken.


While the chicken is cooking, chop the onion, celery and bell pepper and cut the sausage into ½ inch thick pieces.


Make the roux by heating the oil on medium heat and adding the flour. Stir continuously till the roux is a darker golden brown and not let the flour burn. (This is very important). This will take about 30 min or so. Be careful because it is very hot.


Add the veggies and bay leaf when the roux is ready and cook till they are almost tender, then add the cayenne pepper. Cook a few more minutes.


Add the chicken, sausage, seasonings and the stock. If you are using okra, add okra. Let simmer on low heat till desire thickness or about 20-30 min. Serve over white rice. ENJOY!!!


Thursday, October 14, 2010

WE ARE ON A ROLL!: The Daring Cooks' October 2010 Challenge

Our October 2010 hostess, Lori of Lori’s Lipsmacking Goodness, has challenged The Daring Cooks to stuff grape leaves. Lori chose a recipe from Aromas of Aleppo and a recipe from The New Book of Middle Eastern Food. The challenge this month requires Daring cooks to make a filling (meat or meatless, but must include rice) and roll it in grape leaves (or Swiss chard, kale, cabbage or some tough green).
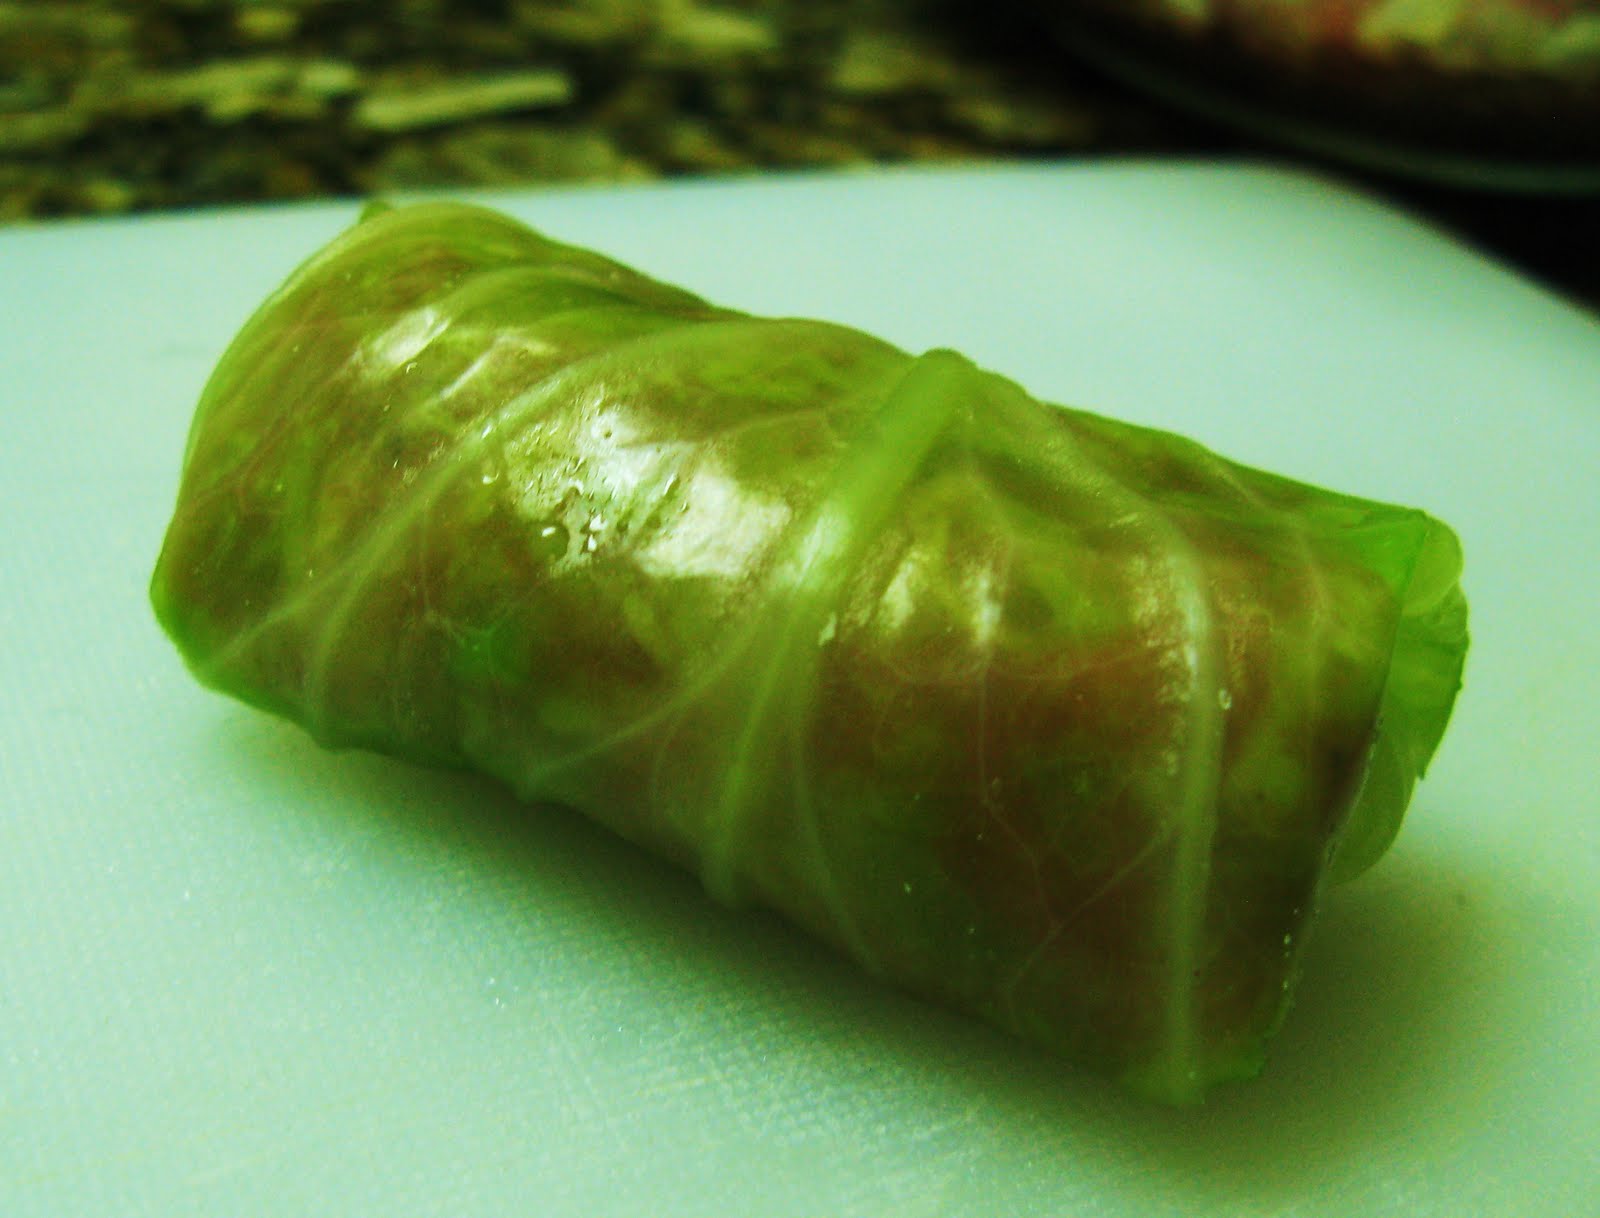
I didn't even attempt to find the grape leaves because I am not a big fan of them. I thought about using collard or mustard greens and using fish or shrimp but time was running out and I just did STUFFED CABBAGE ROLLS!I am pleased with how they turned out. I made up the filling with some basic ingredients.
Ingredients for filling:

ground turkey
cooked rice
diced onion
diced celery
salt and pepper
soy sauce
sesame oil

Depending on how much you want to make, just eyeball the ingredients. I used 2:1 ration of meat:rice. Added spices and sauteed a lil onion and celery (add or omit what you like). Blanched the cabbage leaves. Remove the hearts and stuff them with the filling. Roll. Cover with boiling salted water and bake for 20-30 min or boil till the meat is done about 8 min.


The Filling


Blanched Cabbage Leaves


Before Rolling


Cute Cabbage Roll


Enjoy the Stuffed Cabbage Rolls!!


Wednesday, September 29, 2010

The Daring Bakers' September 2010 Challenge: Decorated Sugar Cookies


The September 2010 Daring Bakers’ challenge was hosted by Mandy of “What the Fruitcake?!” Mandy challenged everyone to make Decorated Sugar Cookies based on recipes from Peggy Porschen and The Joy of Baking. It was mandatory for us to use t Peggy Porschen's Basic Sugar Cookie recipe provided and decorate the cookies using Royal Icing recipe adapted from The Joy of Baking with the theme of September, whatever that means to us. All recipes and tips follwed are what was given to us in the challange. I am not a cookie baker and I do not have much to add as far as cookie knowledge goes but I will get better as I do more I hope :). I do prefer cakes and other desrts to cookies...even in cookies sugar cookies are not my favorite. I like chocolate chip cookies but sugar cookies and decorating them seems like something I can get into when I have more time. The decorating ideas are endless and thus I am sure I will enjoy doing so....

Basic Sugar Cookies:
Makes Approximately 36x 10cm / 4" Cookies

200g / 7oz / ½ cup + 6 Tbsp Unsalted Butter, at room temperature
400g / 14oz / 3 cups + 3 Tbsp All Purpose / Plain Flour
200g / 7oz / 1 cup Caster Sugar / Superfine Sugar
1 Large Egg, lightly beaten
5ml / 1 tsp Vanilla Extract / Or seeds from 1 vanilla bean

Directions
• Cream together the butter, sugar and any flavourings you’re using. Beat until just becoming
creamy in texture.
• Tip: Don’t over mix otherwise you’ll incorporate too much air and the cookies will spread during
baking, losing their shape.
• Beat in the egg until well combined, make sure to scrape down the sides of the bowl.
Add the sifted flour and mix on low until a non sticky dough forms.
• Tip: I don’t have a stand mixer so I find it easier to switch to dough hooks at this stage to avoid
flour flying everywhere.
• Knead into a ball and divide into 2 or 3 pieces.
• Roll out each portion between parchment paper to a thickness of about 5mm/1/5 inch (0.2 inch)
• Refrigerate for a minimum of 30mins.
• Tip: Recipes commonly just wrap the whole ball of dough in clingwrap and then refrigerate it for an
hour or overnight, but by rolling the dough between parchment, this shortens the chilling time and
then it’s also been rolled out while still soft making it easier and quicker.
• Once chilled, peel off parchment and place dough on a lightly floured surface.
• Cut out shapes with cookie cutters or a sharp knife.
• Arrange shapes on parchment lined baking sheets and refrigerate for another 30mins to an hour.
• Tip: It’s very important you chill them again otherwise they’ll spread while baking.
• Re-roll scraps and follow the above process until all scraps are used up.
• Preheat oven to 180°C (160°C Fan Assisted) / 350°F / Gas Mark 4.
• Bake until golden around the edges, about 8-15mins depending on the size of the cookies.
• Tip: Bake same sized cookies together otherwise mixing smaller with larger cookies could result in
some cookies being baked before others are done.
• Tip: Rotate baking sheets half way through baking if your oven bakes unevenly.
• Leave to cool on cooling racks.
• Once completely cooled, decorate as desired.
• Tip: If wrapped in tinfoil/cling wrap or kept in airtight containers in a cool place, un-decorated cookies can last up to a month.

Royal Icing:


315g – 375g / 11oz – 13oz / 2½ - 3 cups Icing / Confectioner’s / Powdered Sugar, unsifted
2 Large Egg Whites
10ml / 2 tsp Lemon Juice
5ml / 1 tsp Almond Extract, optional

Directions

• Beat egg whites with lemon juice until combined.
• Tip: It’s important that the bowls/spoons/spatulas and beaters you use are thoroughly cleaned and
grease free.
• Sift the icing sugar to remove lumps and add it to the egg whites.
• Tip: I’ve listed 2 amounts of icing sugar, the lesser amount is good for a flooding consistency, and the larger amount is for outlining, but you can add even more for a much thicker consistency good for writing. If you add too much icing sugar or would like to make a thinner consistency, add very small amounts of water, a few drops at a time, until you reach the consistency you need.
• Beat on low until combined and smooth.
• Use immediately or keep in an airtight container.
• Tip: Royal Icing starts to harden as soon as it’s in contact with air so make sure to cover containers with plastic wrap while not in use.

Decorating Your Cookies: Flooding
“Flooding” a cookie is a technique used when covering a cookie with Royal Icing.
1. You outline the area you want to flood which helps create a dam
2. Then fill or flood inside the area you’ve outlined

Decorating Your Cookies: What You'll Need
- Piping bags / Parchment Cones / Ziplock Bags
- Elastic bands
- Piping tips (between sizes 1 & 5)
- Couplers
- Glasses (handy for standing your piping bags in)
- Clean clothes, dry & damp
- Toothpicks
- Gel or paste food colouring

Decorating Your Cookies: Royal Icing
The most important thing when it comes to decorating with Royal Icing is the consistency.

There are two ways of flooding your cookies. Some like to do the outline with a thicker icing and then flood with a thinner icing. Some like to use the same icing to do both which saves time and you don’t have to have two different piping bags for each colour you’re using.

The Same Consistency Method
Consistency:
• Mix your royal icing according to the recipe/instructions
• Drag a knife through the surface of the Royal Icing and count to 10
• If the surface becomes smooth between 5 & 10 seconds, the icing is at the correct consistency
• Tip: If your icing is too thick, thin it by adding a few drops of water. Mix, do the 10 second test, then if it’s still too thick, add a few more drops of water, repeat, etc.
• Tip: To thicken your icing, add small amounts of icing sugar until thick enough for the 10 second test

Two Different Consistencies Method
Consistency:
• Mix your royal icing according to the recipe/instructions.
• Separate into 2 different bowls, one lot of icing for outlining, the other for flooding.
• For the outlining icing, drag a knife through the surface of the Royal Icing.
• If the surface becomes smooth at around 10 seconds, the icing is at the correct consistency.
• Tip: If your icing is too thick, thin it by adding a few drops of water. Mix, count to 10 seconds, then if it’s still too thick, add a few more drops of water, repeat, etc.
• Tip: To thicken your icing, add small amounts of icing sugar until thick enough for the 10 second test.
• For the flooding/filling icing, drag a knife through the surface of the Royal Icing.
• If the surface becomes smooth at around 3-4 seconds, the icing is at the correct consistency.
• Tip: If your icing is too thick, thin it by adding a few drops of water. Mix, count to 3-4 seconds, then if it’s still too thick, add a few more drops of water, repeat, etc.
• Tip: To thicken your icing, add small amounts of icing sugar until thick enough for the 3-4 second test.
Colouring
• Separate Royal Icing into separate bowls for each colour you plan on using.
• Tip: Make sure to cover the bowls with cling film or a damp cloth to prevent the top from setting and then making lumps
• Using a toothpick, add gel or paste colouring to each bowl and mix thoroughly until desired colour is reached
• Tip: You can use liquid food colouring but you might not be able to get the desired strength of colour, liquid colouring will also thin out the icing so you’ll need to add more icing sugar to thicken it again.

Prepping and Filling Your Bag
• Attach your icing tips to the piping bags using couplers
• Tip: You don’t need to use a coupler but it makes it easier if you want to change tip sizes
• Tip: A size 1 tip is best for doing intricate details. A size 2 tip is good for some details and outlining. Fill or flood with sizes 2 – 5.
• Tip: You don’t need a piping bag, you can use a parchment cone or ziplock bag with a tiny bit snipped off the corner. I would however recommend getting a piping set if you don’t have one as it will be much easier and more precise.
• Stand the piping bags in glasses with the tops of the bags folded over the top of the glass.
• Fill your icing bags with each coloured icing.
• Tie the ends of the piping bags with elastic bands.

Decorating: Outlining
• Fit the piping bag with a size 2 or 3 tip.
• Tip: Or snip a very small bit of the corner off of a parchment cone or Ziploc bag
• Hold the piping bag at a 45 degree angle above the cookie where you want to start the outline.
• Gently squeeze the piping bag and start moving in the direction you want to outline the cookie.
• Start lifting the piping bag away from the cookie so that the flow of icing falls onto the cookie, making it an even and neater outline.
• As you start to reach the beginning of the outline, bring the piping tip closer to the surface of the cookie to meet the start of the icing outline.
• Tip: If you’re doing an intricate cookie, like a snow flake, you won’t be able to lift the tip as far away from the cookie.
• If you’re doing a different colour border, eg a black border, let the outline dry before flooding. If using the same colour for the outline as you’re flooding with, begin flooding after doing the outline.

Decorating: Flooding
• Fit the piping bag with a size 2-5 tip, the bigger the area being filled, the bigger the tip.
• Tip: Or cut slightly more off the corner of a Ziploc bag to create a slightly larger opening.
• Quickly zigzag back and forth over the area you want to fill.
• Tip: You need to be quick when flooding the cookie so don’t worry too much if it’s not filled in neatly.
• Using a toothpick or clean paintbrush, push the icing around into the gaps that are still remaining.
• Either pick up the cookie and tip it from side to side to even out the filling, or lightly bang the cookie down on your kitchen counter.

Decorating: Melding Colours
• If you would like to add lines or dots to the base colour that you flooded the cookie with so that they meld and dry as a smooth surface, you need to add the lines/dots/patterns as quickly as possible after flooding and smoothing the surface of the cookie.
• Tip: Make sure to have all the colours you’re planning on using ready and close by so that you can switch between colours quickly
• Simply pipe other colours onto the flooded surface in patterns or lines which you can either leave as that or then drag a toothpick through to make marbling patterns.

Decorating: On top of flooding
• If you’d like to do other patterns/outlines or writing on top of the flooded surface so that they are raised above the flooded background, simply allow the icing to dry, preferably over night.
• Fit the piping bag with tip sizes 1-3.
• Pipe patterns or write on top of the dry icing
• Tip: For writing, the consistency of your icing should be thicker rather than thinner, drag a knife through your icing and when the surface smoothes around 12-15 seconds, the consistency is correct.

Packaging and Storing
• Once fully decorated, allow cookies to dry for 24 hours in a cool and dry area.
• Stack cookies in an airtight container, from largest cookies at the bottom, to smallest and more intricate at the top, with parchment or wax free paper in between the layers.
• Store in a cool and dry area with the container’s lid firmly sealed.
• Will last for about a month if stored this way.

General Baking Tips
• When measuring by volume (cup) always shift/aerate your flour/icing sugar in the container/bag before measuring because it settles as it sits and so you end up with more flour/icing sugar in your cup. I do this by moving the ingredient around with a spoon, whisk or fork.
• When measuring flour or icing sugar by volume (cup) never scoop the flour/icing sugar up with the cup otherwise you compress the contents and this can make a big difference in the amount you’re using. Rather, spoon the ingredient into the cup until level with the top.
• When measuring baking powder or baking soda, always level off the top of the measuring spoon with something flat (like the back of a knife) as these ingredients need to be accurately measured.
• When mixing your ingredients, always follow the recipe instructions, especially when it comes to beating in eggs and flour, so if it specifies to mix until just combined or to beat for 4 minutes, follow the instructions to get best results.
• Unless otherwise specified, always have your ingredients at room temperature.
• It’s always best to invest in an oven thermometer so that you know exactly the temperature you’re baking at then you can also find out if you have cold or hot spots in your oven.
• If you need to rotate your trays midst baking, always allow at least half the baking time to lapse before opening your oven to move baking trays around, this allows time for your baked goods to form a good structure so that they won’t flop.

General Royal Icing Tips• Keep a damp cloth handy while decorating your cookies so that if you’re switching between different icing bags, you can keep the tips covered with the damp cloth so that the icing doesn’t dry and clog them.
• If your icing tips do clog, use a toothpick or pin to unclog them.
• Always pipe a little bit of royal icing onto a board/paper towel before you begin to make sure there are no air bubbles.
• Remember to always cover bowls containing royal icing wither cling wrap, a damp cloth or sealable lid so that the surface doesn’t dry.
• Don’t store anything decorated with royal icing in the fridge otherwise the royal icing will become tacky.

Wednesday, September 22, 2010

Daring Cooks September 2010 Challenge: Food Preservation: Apple Butter

The September 2010 Daring Cooks’ challenge was hosted by John of Eat4Fun. John chose to challenge The Daring Cooks to learn about food preservation, mainly in the form of canning and freezing. He challenged everyone to make a recipe and preserve it. John’s source for food preservation information was from The National Center for Home Food Preservation. I had so much fun with this challenge. I made it twice. I gave most of it away to friends and neighbors too!
It's a little time consuming but DELICIOUS!!! I also came up with my own recipe which I was very pleased with. I do want to warn you that this is my own recipe which I am here trying to remember and write down, so forgive me if it is hard to follow and please feel free to email me or leave a comment if you have any questions. Here it is:
9 golden delicious apples
3/4 C apple Juice (and splash lemon juice because I didn't have apple cider)
1 C White sugar
3/4 C Dark corn syrup
1 C Brown sugar
3 Cinnamon sticks
1 TBS cloves
I peeled and cored the apples. Then I chopped them roughly. I placed all the apples, apple juice, lemon juice and the spices in a large pot and let them cook on low till the apples are tender stirring frequently. This took awhile (approximately 2 hours) because I was not only letting the apples cook but also letting all the water evaporate. If you want to strain the liquid out like most recipes calls for, feel free. When all the apples are tender and mashed up to a paste consistency, pick the cinnamon sticks and cloves out and add the sugars and syrup to sweeten and taste. Let it cook to a spread consistency (very thick). Can or freeze. I will not include canning instructions but it is easy to find those online. Good Luck!


Thursday, August 19, 2010

The Daring Cooks August, 2010 Challenge: The World of Pierogi

The August 2010 Daring Cooks’ Challenge was hosted by LizG of Bits n’ Bites and Anula of Anula’s Kitchen. They chose to challenge Daring Cooks to make pierogi from scratch and an optional challenge to provide one filling that best represents their locale.
Pierogi are just dumplings to explain in a simple term. These are popular all over the world and have different names but basically dough rolled out thinly to make shells and stuffed with your favorite filling. Part of the challenge was to make the shells or the skin from scratch and that was my first time ever doing so. It was so easy and yummy. Also the endless choices for the filling makes this challenge extra fun. I chose to do the first one a savory one and I am sure I will be making some sweet ones soon as well.

Pierogi (makes 4 generous servings, around 20 dumplings)
(Traditional Polish recipe, although each family will have their own version, this is Anula's family recipe)

Dough:
2 to 2 1/2 cups (300 to 375 g) all-purpose (plain) flour
1 large egg
1 teaspoon (5 ml) salt
About 1 cup (250 ml) lukewarm water
Place 2 cups flour in a large bowl or on a work surface and make a well in the center. Break the egg into it, add the salt and a little lukewarm at a time (in my situation 1/2 cup was enough). Bring the dough together, kneading well and adding more flour or water as necessary. Cover the dough with a bowl or towel. You’re aiming for soft dough. Let it rest 20 minutes.


On a floured work surface, roll the dough out thinly (1/8” or about 3 millimeters) cut with a 2-inch (5 cm) round or glass (personally I used 4-inch/10 cm cutter as it makes nice size pierogi - this way I got around 30 of them and 1 full, heaped teaspoon of filling is perfect for that size). Spoon a portion (teaspoon will be the best) of the filling into the middle of each circle. Fold dough in half and pinch edges together. Gather scraps, re-roll and fill. Repeat with remaining dough.


This month we were given the choice to pick our own filling and I decided to go with a mushroom and cheese filling. I used regular white button mushrooms and smoked Gouda cheese.

The Filling

8 oz mushrooms, chopped into small pieces(about 2 C)
1 yellow pepper, chopped (about 1 C)
1 tsp minced garlic
1 TBS olive oil
1 1/2 cup smoked Gouda Cheese, shredded


Saute the garlic and peppers in olive oil for a few min till peppers are almost tender.


Add the mushroom and saute till tender.


Look how pretty the sauteed mushroom mixture is !!


Have your cheese ready.


Fill the pirogies.


Pan fry and ENJOY!!!

Friday, July 30, 2010

THE DARING BAKERS JULY, 2010 CHALLENGE: SWISS SWIRL ICE CREAM CAKE

The July 2010 Daring Bakers’ challenge was hosted by Sunita of Sunita’s world – life and food. Sunita challenged everyone to make an ice-cream filled Swiss roll that’s then used to make a bombe with hot fudge. Her recipe is based on an ice cream cake recipe from Taste of Home.

This is a little time consumming but very good for summer. I love the look of it as well. I enjoy making ice cream cakes and will make this one again. For those who don't have time, you can always use store bought swiss rolls or/and or ice cream and just assemble the cake for a quick party etc.


Swiss roll ice cream cake
(inspired by the recipe of the same name from the Taste of Home website)

The Swiss rolls

Preparation time- 10 minutes
Baking time- 10-12 minutes
Rolling and cooling time- at least 30 minutes
Filling-5-8 minutes
Filling and rolling- 5-10 minutes

Ingredients


6 medium sized eggs
1 C / 225 gms caster sugar /8 oz+ extra for rolling
6 tblsp / 45gms/ a pinch over 1.5 oz of all purpose (plain) flour + 5 tblsp/40gm /a pinch under 1.5 oz of natural unsweetened cocoa powder, sifted together
2 tblsp /30ml / 1 fl oz of boiling water
a little oil for brushing the pan


1. Pre heat the oven at 200 deg C /400 deg F approximately. Brush the baking pans ( 11 inches by 9 inches ) with a little oil and line with greaseproof baking paper. If you have just one pan, bake one cake and then let the pan cool completely before using it for the next cake.
2. In a large mixing bowl, add the eggs and sugar and beat till very thick; when the beaters are lifted, it should leave a trail on the surface for at least 10 seconds.

3. Add the flour mixture, in three batches and fold in gently with a spatula. Fold in the water.

4. Divide the mixture among the two baking pans and spread it out evenly, into the corners of the pans.
5. Place a pan in the centre of the pre heated oven and bake for about 10-12 minutes or till the centre is springy to the touch.

6. Spread a kitchen towel on the counter and sprinkle a little caster sugar over it.
7. Turn the cake on to the towel and peel away the baking paper. Trim any crisp edges.

8. Starting from one of the shorter sides, start to make a roll with the towel going inside. Cool the wrapped roll on a rack, seam side down.

Repeat the same for the next cake as well.


For the filling


2C / 500 mls/ 16 fl oz of whipping cream
1 vanilla pod, cut into small pieces of about ½ cm (or 1 tsp vanilla extract)
5 tblsp / 70gms/2.5oz of caster sugar

Grind together the vanilla pieces and sugar in a food processer till nicely mixed together. If you are using vanilla extract, just grind the sugar on its own and then add the sugar and extract to the cream.

In a large bowl, add the cream and vanilla-sugar mixture and beat till very thick.
Divide the cream mixture between the completely cooled cakes.
Open the rolls and spread the cream mixture, making sure it does not go right to the edges (a border of ½ an inch should be fine).

Roll the cakes up again, this time without the towel. Wrap in plastic wrap and chill in the fridge till needed, seam side down.

The vanilla ice cream


Preparation time-5 minutes+freezing

I have made the ice cream without an ice cream maker.

Ingredients

2 and ½ C / 625 ml / 20 fl oz of whipping cream
1 vanilla bean, minced or 1 tsp/ 5 ml/ .15 fl oz vanilla extract
½ C / 115gms/ 4 oz of granulated sugar


Grind together the sugar and vanilla in a food processor. In a mixing bowl, add the cream and vanilla –sugar mixture and whisk lightly till everything is mixed together. If you are using the vanilla extract, grind the sugar on its own and then and the sugar along with the vanilla extract to the cream.

Pour into a freezer friendly container and freeze till firm around the edges. Remove from the freezer, beat till smooth and return to the freezer. Do this 3-4 times and then set completely.

The Hot fudge sauce (I made this just after adding the layer of vanilla ice cream to the cake)

Preparation time-2 minutes
Cooking time-2 minutes

Ingredients


1 C / 230gms/ 8 oz of caster sugar
3 tblsp / 24gms/1.5 oz of natural unsweetened cocoa powder
2 tblsp /15gms/ 1 oz of cornflour/cornstarch
1 and ½ C /355ml /12 fl oz of water
1 tblsp /14gms/ 1 oz butter
1 tsp/5 ml / .15 fl oz vanilla extract


In a small saucepan, whisk together the sugar, cocoa powder, cornflour and water.

Place the pan over heat, and stir constantly, till it begins to thicken and is smooth (for about 2 minutes).
Remove from heat and mix in the butter and vanilla. Keep aside to cool .


The chocolate ice cream


Preparation time- 5 minutes + freezing

Ingredients

2C/ 500 ml whipping cream
1 C/230gms/8 oz caster sugar
3 tblsp/ 24 gms/1.5 oz of natural unsweetened cocoa powder


1. Grind together the sugar and the cocoa powder in a food processor .
2. In a saucepan, add all the ingredients and whisk lightly.
3. Place the pan over heat and keep stirring till it begins to bubble around the edges.

Remove from heat and cool completely before transferring to a freezer friendly container till firm around the edges. If you are using an ice cream maker, churn the ice cream according to the manufacturer’s instruction, after the mixture has cooled completely.
Remove from the freezer, beat till smooth and return to the freezer. Do this 3-4 times and then set completely.

Assembly


1. Cut the Swiss rolls into 20 equal slices ( approximately 2 cms each ).

2. Cover the bottom and sides of the bowl in which you are going to set the dessert with cling film/plastic wrap.

3. Arrange two slices at the bottom of the pan, with their seam sides facing each other. Arrange the Swiss roll slices up the bowl, with the seam sides facing away from the bottom, to cover the sides of the bowl. Cover the bowl with plastic wrap and freeze till the slices are firm (at least 30 minutes).

4. Soften the vanilla ice cream. Take the bowl out of the freezer, remove the cling film cover and add the ice cream on top of the cake slices. Spread it out to cover the bottom and sides of the bowl. Cover the bowl with plastic wrap and freeze till firm ( at least 1 hour)


5. Add the fudge sauce over the vanilla ice cream, cover and freeze till firm. ( at least an hour)

6. Soften the chocolate ice cream and spread it over the fudge sauce. Cover with plastic wrap and freeze for at least 4-5 hours till completely set .

7. Remove the plastic cover, and place the serving plate on top of the bowl. Turn it upside down and remove the bowl and the plastic lining. If the bowl does not come away easily, wipe the outsides of the bowl with a kitchen towel dampened with hot water. The bowl will come away easily.

8. Keep the cake out of the freezer for at least 10 minutes before slicing, depending on how hot your region is. Slice with a sharp knife, dipped in hot water.

Enjoy it at home or impress your friends at a party!!!!

Monday, July 19, 2010

The Daring Cooks July 2010 Challenge: Nut Butters : Asian Noodle Salad with Peanut Dressing and Grilled Curry Chicken

The July 2010 Daring Cooks’ Challenge was hosted by Margie of More Please and Natashya of Living in the Kitchen with Puppies. They chose to challenge Daring Cooks to make their own nut butter from scratch, and use the nut butter in a recipe. Their sources include Better with Nut Butter by Cooking Light Magazine, Asian Noodles by Nina Simonds, and Food Network online. We were given a few recipes to pick from and many choices of nuts. I chose the Asian Noodle salad recipe with Peanut Dressing and decided to add grilled curry chicken on top (the original recipe uses shrimp).

Asian Noodle Salad with Peanut Dressing

Yield: 4 servings

Recipe notes: Customize the salad by adding or substituting your favorite vegetables. Shredded cabbage, bean sprouts, and slivered carrots would make nice additions. Obviously, you can omit the shrimp, or substitute chicken or tofu or the protein of your choice. The dressing is equally as good with peanut butter rather than cashew butter. We tested the dressing with nut butters made from salted cashews & peanuts with good results.

Directions:


Peanut Butter:
1 cup dry roasted peanuts (I used unsalted)

Make peanut butter: Grind peanuts in food processor for about 2 minutes until smooth. (*Or start with ½ cup prepared peanut butter.)


Peanut Dressing:
½ inch (1 cm) slice of fresh ginger, chopped
8 cloves garlic, more or less to taste, chopped
½ cup (120 ml) peanut butter
¼ cup (60 ml) soy sauce
3 Tablespoons (45 ml) sugar
3 Tablespoons (45 ml) vinegar
3 Tablespoons (45 ml) toasted sesame oil
¼ cup plus 1 Tablespoon (75 ml) water
Hot sauce to taste (optional)

Prepare peanut dressing: Combine ginger, garlic, peanut butter, soy sauce, sugar, vinegar, sesame oil, and water in food processor or blender. Process/blend until smooth. Be sure to process long enough to puree the ginger and garlic. The dressing should be pourable, about the same thickness as cream. Adjust consistency – thinner or thicker -- to your liking by adding more water or peanut butter. Taste and add your favorite hot sauce if desired. (If the cashew butter was unsalted, you may want to add salt to taste.) Makes about 1 ½ cups (360 ml) dressing. Store any leftover dressing in the refrigerator.


My Grilled Curry Chicken

2 boneless skinless chicken breasts (butterfiled)
2 TBS peanut butter
1 tsp curry powder
1 TBS fish sauce (optional)
1 TBS lime juice
pinch of salt

Marinate the chicken with rest of the ingridients for about 15 min and grill. Chop the grilled chicken into big cubes.


Noodle Salad:
1/2 pound (225 g) linguine or thin rice noodles
1 tablespoon (15 ml) olive oil
1 large red bell pepper, cored and seeded, cut into thin strips (I omitted this)
1 cucumber, peeled, seeded, sliced (I omitted this)
1/4 cup (60 ml) sliced green onions
1/4 cup (60 ml) chopped fresh basil
1 tablespoon (15 ml) chopped peanuts (optional garnish)
Lime wedges (optional)
Cilantro (optional)
Prepare noodles according to package instructions in salted water. Rinse and drain noodles. Set aside.
Slice basil into thin ribbons. Combine noodles, bell pepper, cucumber, onions, and basil in a large bowl. Add about ½ cup (120 ml) peanut dressing; toss gently to coat. Add more peanut dressing as desired, using as much or as little as you’d like. Scatter grilled chicken on top. Squeeze fresh lime juice over salad or serve with lime wedges. Sprinkle with chopped or cilantro if desired.

Friday, July 2, 2010

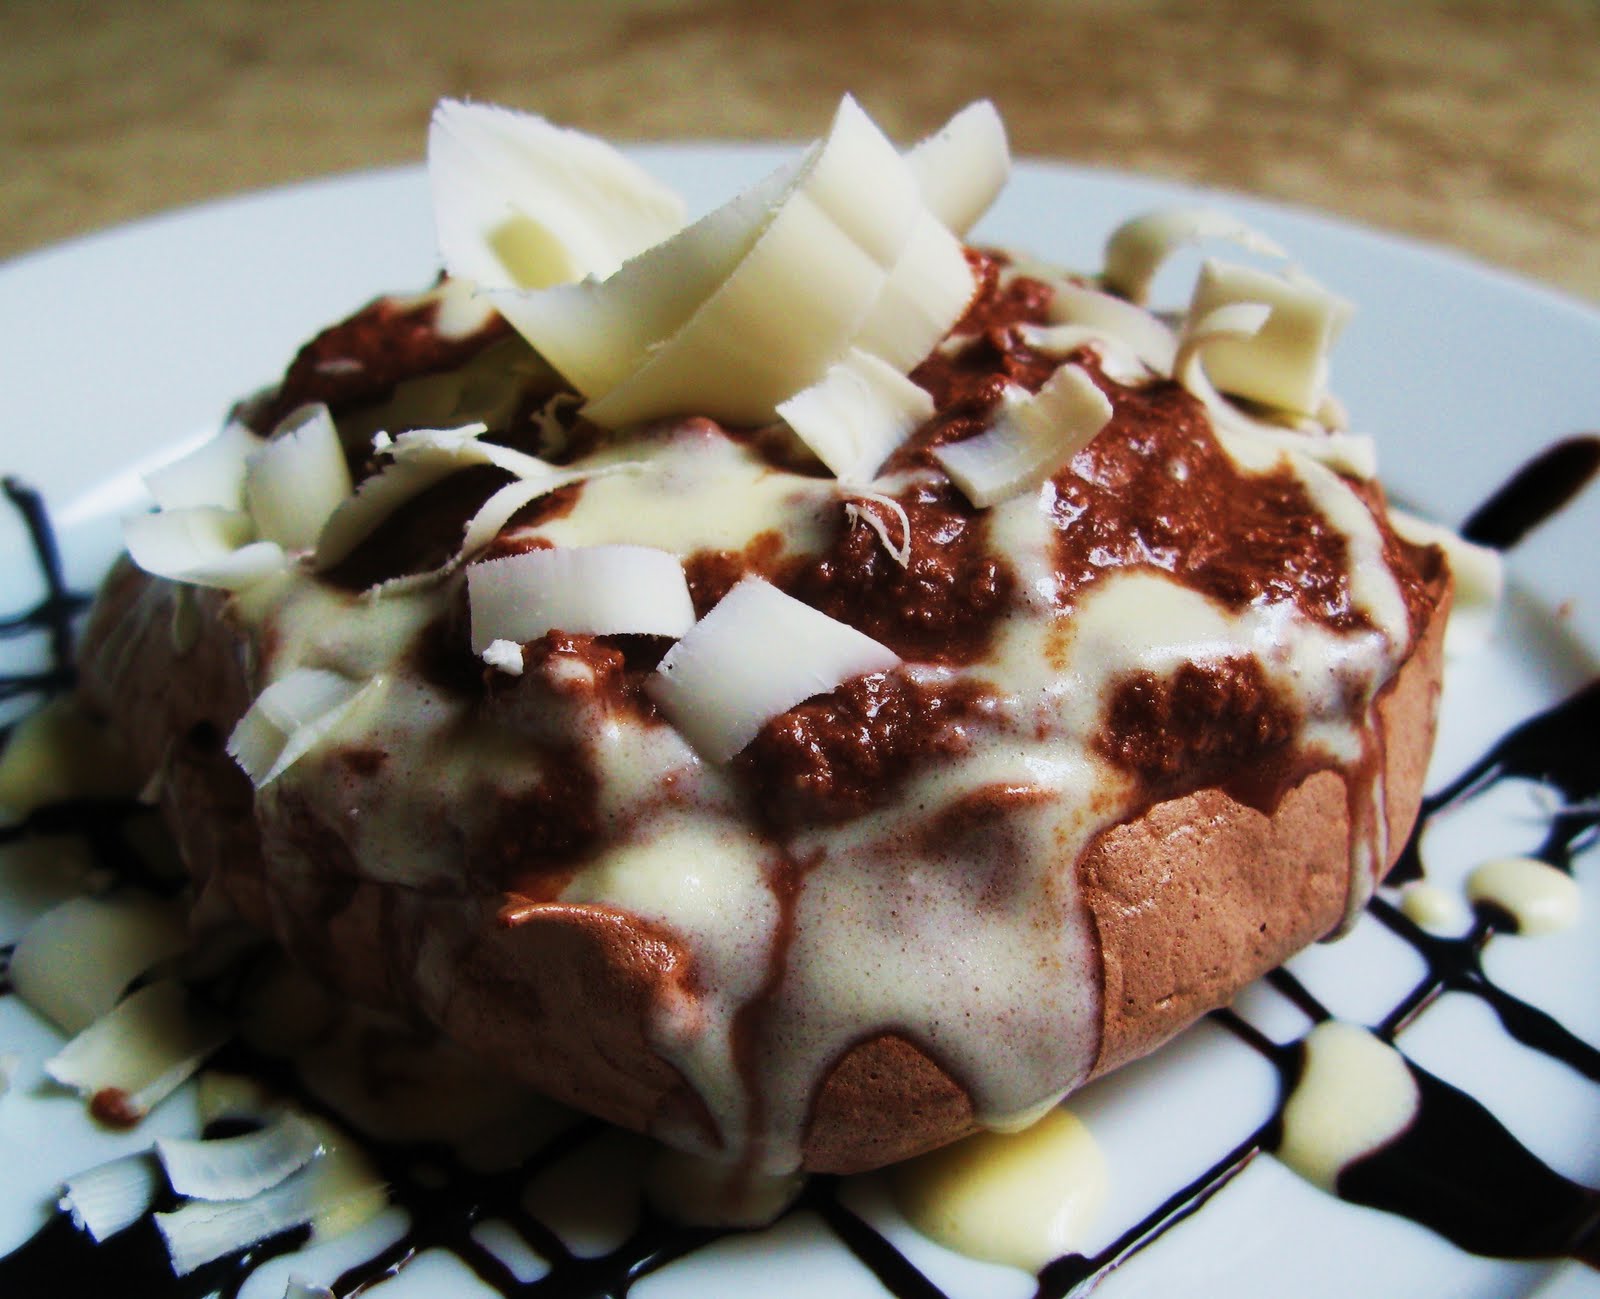
JUNE 2010 - Daring Baker's Challenge: Chocolate Pavlovas with Chocolate Mascarpone Mousse

The June 2010 Daring Bakers’ challenge was hosted by Dawn of Doable and Delicious. Dawn challenged the Daring Bakers’ to make Chocolate Pavlovas and Chocolate Mascarpone Mousse. The challenge recipe is based on a recipe from the book Chocolate Epiphany by Francois Payard.
This is something very new to me and was a fun experience to make. It is a light summer desert that would go with many fresh fruits that are in season for the summer too.

Preparation time
: The recipe can be made in one day although there are several steps involved.

* While the pavlovas are baking, the crème anglaise should be made which will take about 15 minutes.
* While it is cooling, the chocolate mascarpone mousse can be made which will take about 15 minutes.
* There will be a bit of a wait time for the mascarpone cream because of the cooling time for the Crème Anglaise.
* If you make the Crème Anglaise the day before, the dessert should take about 2 hours including cooking time for the pavlovas.

Equipment required:
• Baking sheet(s) with parchment or silpat
• Several bowls
• Piping bag with pastry tip
• Hand or stand mixer


Recipe 1: Chocolate Meringue (for the chocolate Pavlova):

3 large egg whites
½ cup plus 1 tbsp (110 grams) white granulated sugar
¼ cup (30 grams) confectioner’s (icing)
1/3 cup (30 grams) cocoa powder


Directions:


1. Place a rack in the center of the oven and preheat to 200º F (95º C) degrees. Line two baking sheets with silpat or parchment and set aside.

2. Put the egg whites in a bowl and whip until soft peaks form. Increase speed to high and gradually add granulated sugar about 1 tbsp at a time until stiff peaks form. (The whites should be firm but moist.)

3. Sift the confectioner’s sugar and cocoa powder over the egg whites and fold the dry ingredients into the white. (This looks like it will not happen. Fold gently and it will eventually come together.)

4. Fill a pastry bag with the meringue. Pipe the meringue into whatever shapes you desire. Alternatively, you could just free form your shapes and level them a bit with the back of a spoon.

5. Bake for 2-3 hours until the meringues become dry and crisp. Cool and store in an airtight container for up to 3 days.

Recipe 2: Chocolate Mascarpone Mousse (for the top of the Pavlova base):


1 ½ cups (355 mls) heavy cream (cream with a milk fat content of between 36 and 40 percent)
grated zest of 1 average sized lemon
9 ounces (255 grams) 72% chocolate, chopped
1 2/3 cups (390 mls) mascarpone
pinch of nutmeg
2 tbsp (30 mls) Grand Marnier (or orange juice)

Directions:


1. Put ½ cup (120 mls) of the heavy cream and the lemon zest in a saucepan over medium high heat. Once warm, add the chocolate and whisk until melted and smooth. Transfer the mixture to a bowl and let sit at room temperature until cool.

2. Place the mascarpone, the remaining cup of cream and nutmeg in a bowl. Whip on low for a minute until the mascarpone is loose. Add the Grand Marnier and whip on medium speed until it holds soft peaks. (DO NOT OVERBEAT AS THE MASCARPONE WILL BREAK.)

3. Mix about ¼ of the mascarpone mixture into the chocolate to lighten. Fold in the remaining mascarpone until well incorporated. Fill a pastry bag with the mousse. Again, you could just free form mousse on top of the pavlova.

Recipe 3: Mascarpone Cream (for drizzling):

1 recipe crème anglaise
½ cup (120 mls) mascarpone
2 tbsp (30 mls) Sambucca (optional)
½ cup (120 mls) heavy cream

Directions
:

1. Prepare the crème anglaise. Slowly whisk in the mascarpone and the Sambucca and let the mixture cool. Put the cream in a bowl and beat with electric mixer until very soft peaks are formed. Fold the cream into the mascarpone mixture.

Recipe 4: Crème Anglaise (a component of the Mascarpone Cream above):


1 cup (235 mls) whole milk
1 cup (235 mls) heavy cream
1 vanilla bean, split or 1 tsp pure vanilla extract
6 large egg yolks
6 tbsp (75 grams) sugar

Directions:


1. In a bowl, whisk together the egg yolks and sugar until the mixture turns pale yellow.
2. Combine the milk, cream and vanilla in a saucepan over medium high heat, bringing the mixture to a boil. Take off the heat.

3. Pour about ½ cup of the hot liquid into the yolk mixture, whisking constantly to keep from making scrambled eggs. Pour the yolk mixture into the pan with the remaining cream mixture and put the heat back on medium. Stir constantly with a wooden spoon until the mixture thickens enough to lightly coat the back of a wooden spoon. DO NOT OVERCOOK.
4. Remove the mixture from the heat and strain it through a fine mesh sieve into a bowl. Cover and refrigerate until the mixture is thoroughly chilled, about 2 hours or overnight.

Assembly:

Pipe the mousse onto the pavlovas and drizzle with the mascarpone cream over the top. Dust with confectioner’s sugar and fresh fruit if desired.

Monday, June 21, 2010

Three Spice Liver Pâté -The Daring Cook's June 2010 Challenge


Our hostesses this month, Evelyne of Cheap Ethnic Eatz, and Valerie of a The Chocolate Bunny, chose delicious pate with freshly baked bread as their June Daring Cook’s challenge! They’ve provided us with 4 different pate recipes to choose from and are allowing us to go wild with our homemade bread choice. I chose the Three Spice Livger Pâté and french bread to go with it. The Pâté was easy to make, but I had a hard time getting pork belly to get grinded up in the food processor, so next time I'll chop it up finely first. The house smelled so good when it was baking and my mom couldn't wait to eat. My bread turned out ok but didn't look pretty and I don't have any pictures. Both tasted great, but I made it in a loaf pan I still have a lot left over. Next time I'll halve the recipe. Fun Challenge in deed!


Three Spice Liver Pâté

1 lb / 454 grams pork liver (or beef or combination)
1/2 lb / 227 grams ground pork
1/2 lb / 227 grams pork fat (or pork belly)
2 cloves garlic
2 shallots
1 whole egg and 1 egg yolk
1/2 tsp / 2 ml cinnamon
1/2 tsp / 2 ml coriander (ground or crushed)
1/2 tsp / 2 ml cumin
3/4 tsp / 3 ml salt
1 tbps / 15 ml coarse freshly cracked peppercorns
2 tbps / 30 ml cognac
2 bay leaves
1 package of bacon
Preheat oven to to 350ºF (180ºC).

Cut liver and pork fat into small pieces and add to food processor. Add ground pork, garlic, shallots, cinnamon, cumin, coriander, salt and pepper. Grind until smooth.

In mixing bowl, incorporate the meat and liver mixture with the cognac and eggs.

Line bottom of baking or ceramic pan with overlapping pieces of bacon. Place a bay leaf on the bottom and then fill with meat/liver mixture. Cover top with another bay leaf and then overlapping pieces of bacon.

Place in oven in the larger baking pan and add enough water to cover 2/3rds of the pan containing the meat/liver mixture. Bake for about 1-1.5 hrs.

The pâté will contract and the juices will be on the bottom. Allow to cool and soak up the juices. Remove any excess bacon and discard the bay leaves.

French Baguette
yield: Three 16" baguettes

Starter
1/2 cup / 120 ml cool water
1/16 teaspoon active dry yeast
1 cup / 240 ml flour

Dough
1 tsp / 5 ml active dry yeast
1 cup to 1 1/4 cups / 240 ml to 300 ml lukewarm water*
all of the starter
3 1/2 cups / 840 ml flour
1 1/2 tsp / 7 ml salt

*Use the lesser amount in summer (or in a humid environment), the greater amount in winter (or in a dry climate), and somewhere in between the rest of the year, or if your house is climate controlled.

Make the starter by mixing the yeast with the water, then mixing in the flour to make a soft dough. Cover and let rest at room temperature for about 14 hours; overnight works well. The starter should have risen and become bubbly.

Mix active dry yeast with the water and then combine with the starter, flour, and salt. Mix and knead everything together—by hand, mixer or bread machine set on the dough cycle—till you've made a soft, somewhat smooth dough; it should be cohesive, but the surface may still be a bit rough. Knead for about 5 minutes on speed 2 of a stand mixer.

Place the dough in a lightly greased medium-size bowl, cover the bowl, and let the dough rise for 3 hours, gently deflating it and turning it over after 1 hour, and then again after 2 hours.

Turn the dough out onto a lightly greased work surface. Divide it into three equal pieces. Shape each piece into a rough, slightly flattened oval, cover with greased plastic wrap, and let them rest for 15 minutes.

Working with one piece of dough at a time, fold the dough in half lengthwise, and seal the edges with the heel of your hand. Flatten it slightly, and fold and seal again. With the seam-side down, cup your fingers and gently roll the dough into a 15" log. Place the logs seam-side down onto a lightly greased or parchment-lined sheet pan or pans.

Cover them with a cover or lightly greased plastic wrap, and allow the loaves to rise till they've become very puffy, about 1 1/2 hours. Towards the end of the rising time, preheat your oven to 450ºF (240ºC).

Using a very sharp knife held at about a 45° angle, make three 8" vertical slashes in each baguette. Spritz the baguettes heavily with warm water; this will help them develop a crackly-crisp crust.

Bake the baguettes until they're a very deep golden brown, 25 to 30 minutes. Remove them from the oven and cool on a rack. Or, for the very crispiest baguettes, turn off the oven, crack it open about 2", and allow the baguettes to cool in the oven.

Thursday, May 27, 2010

Croquembouche (Piece Montée) May 2010 Daring Bakers’ Challenge

Wow! What a challenge this month! I have always wanted to try making cream puffs and/or eclairs and I finally had the chance with this month's Daring Bakers' Challenge. The May 2010 Daring Bakers’ challenge was hosted by Cat of Little Miss Cupcake. Cat challenged everyone to make a piece montée, or croquembouche, based on recipes from Peter Kump’s Baking School in Manhattan and Nick Malgieri. This is definately something that I will make only for very special occasions because of all the multiple steps involved. My daughter turned two the day before the challenge was due so it was a perfect occasion to make such a complicated yet fun desert for her special day. I am happy with the outcome but can't wait to make it again with some adjustments I learned from this first attempt. I think the second one will be prettier and I am looking forward to making it. Here is the recipe:

Ingredients:
Pate a Choux (Yield: About 28)
¾ cup (175 ml.) water
6 Tbsp. (85 g.) unsalted butter
¼ Tsp. salt
1 Tbsp. sugar
1 cup (125 g.) all-purpose flour
4 large eggs

For Egg Wash: 1 egg and pinch of salt

Pre-heat oven to 425◦F/220◦C degrees. Line two baking sheets with parchment paper.

Preparing batter:
Combine water, butter, salt and sugar in a saucepan over medium heat. Bring to a boil and stir occasionally. At boil, remove from heat and sift in the flour, stirring to combine completely.

Return to heat and cook, stirring constantly until the batter dries slightly and begins to pull away from the sides of the pan.
Transfer to a bowl and stir with a wooden spoon 1 minute to cool slightly.

Add 1 egg. The batter will appear loose and shiny.
As you stir, the batter will become dry-looking like lightly buttered mashed potatoes.

It is at this point that you will add in the next egg. Repeat until you have incorporated all the eggs.

Piping:
Transfer batter to a pastry bag fitted with a large open tip (I piped directly from the bag opening without a tip). Pipe choux about 1 inch-part in the baking sheets. Choux should be about 1 inch high about 1 inch wide.

Using a clean finger dipped in hot water, gently press down on any tips that have formed on the top of choux when piping. You want them to retain their ball shape, but be smoothly curved on top.
Brush tops with egg wash (1 egg lightly beaten with pinch of salt).

Baking:
Bake the choux at 425◦F/220◦C degrees until well-puffed and turning lightly golden in color, about 10 minutes.

Lower the temperature to 350◦F/180◦C degrees and continue baking until well-colored and dry, about 15-20 minutes more. (My oven was really hot and I think I over cooked the bottoms a bit with 20 min). Remove to a rack and cool.
Can be stored in a airtight box overnight.


For the Vanilla Crème Patissiere (Half Batch)

1 cup (225 ml.) whole milk
2 Tbsp. cornstarch
6 Tbsp. (100 g.) sugar
1 large egg
2 large egg yolks
2 Tbsp. (30 g.) unsalted butter
1 Tsp. Vanilla

Dissolve cornstarch in ¼ cup of milk. Combine the remaining milk with the sugar in a saucepan; bring to boil; remove from heat.

Beat the whole egg, then the yolks into the cornstarch mixture. Pour 1/3 of boiling milk into the egg mixture, whisking constantly so that the eggs do not begin to cook.

Return the remaining milk to boil. Pour in the hot egg mixture in a stream, continuing whisking.

Continue whisking (this is important – you do not want the eggs to solidify/cook) until the cream thickens and comes to a boil. Remove from heat and beat in the butter and vanilla.


Filling:

When you are ready to assemble your piece montée, using a plain pastry tip, pierce the bottom of each choux. Fill the choux with pastry cream using either the same tip or a star tip, and place on a paper-lined sheet. Choux can be refrigerated briefly at this point while you make your glaze.

Use one of these to top your choux and assemble your piece montée.

Chocolate Glaze:

8 ounces/200 g. finely chopped chocolate (use the finest quality you can afford as the taste will be quite pronounced; I recommend semi-sweet)

Melt chocolate in microwave or double boiler. Stir at regular intervals to avoid burning. Use the best quality chocolate you can afford. Use immediately.

Hard Caramel Glaze:

1 cup (225 g.) sugar
½ teaspoon lemon juice

Combine sugar and lemon juice in a saucepan with a metal kitchen spoon stirring until the sugar resembles wet sand. Place on medium heat; heat without stirring until sugar starts to melt around the sides of the pan and the center begins to smoke. Begin to stir sugar. Continue heating, stirring occasionally until the sugar is a clear, amber color. Remove from heat immediately; place bottom of pan in ice water to stop the cooking. Use immediately.

Assembly of your Piece Montée
:
You may want to lay out your unfilled, unglazed choux in a practice design to get a feel for how to assemble the final dessert. For example, if making a conical shape, trace a circle (no bigger than 8 inches) on a piece of parchment to use as a pattern. Then take some of the larger choux and assemble them in the circle for the bottom layer. Practice seeing which pieces fit together best.

Once you are ready to assemble your piece montée, dip the top of each choux in your glaze (careful it may be still hot!), and start assembling on your cake board/plate/sheet. Continue dipping and adding choux in levels using the glaze to hold them together as you build up.

Saturday, May 15, 2010

Stacked Green Chile & Grilled Chicken Enchilada : The Daring Cooks May 2010 Challenge

What better way to celebrate Cinco De Mayo with some homemade Mexican food? It is time for another Daring Cook's Challenge and it is Enchiladas!!!!Our hosts this month, Barbara of Barbara Bakes and Bunnee of Anna+Food have chosen a delicious Stacked Green Chile & Grilled Chicken Enchilada recipe in celebration of Cinco De Mayo! The recipe, featuring a homemade enchilada sauce was found on www.finecooking.com and written by Robb Walsh. Since I am in TX, it was very easy to get all the ingredients needed to make this dish.
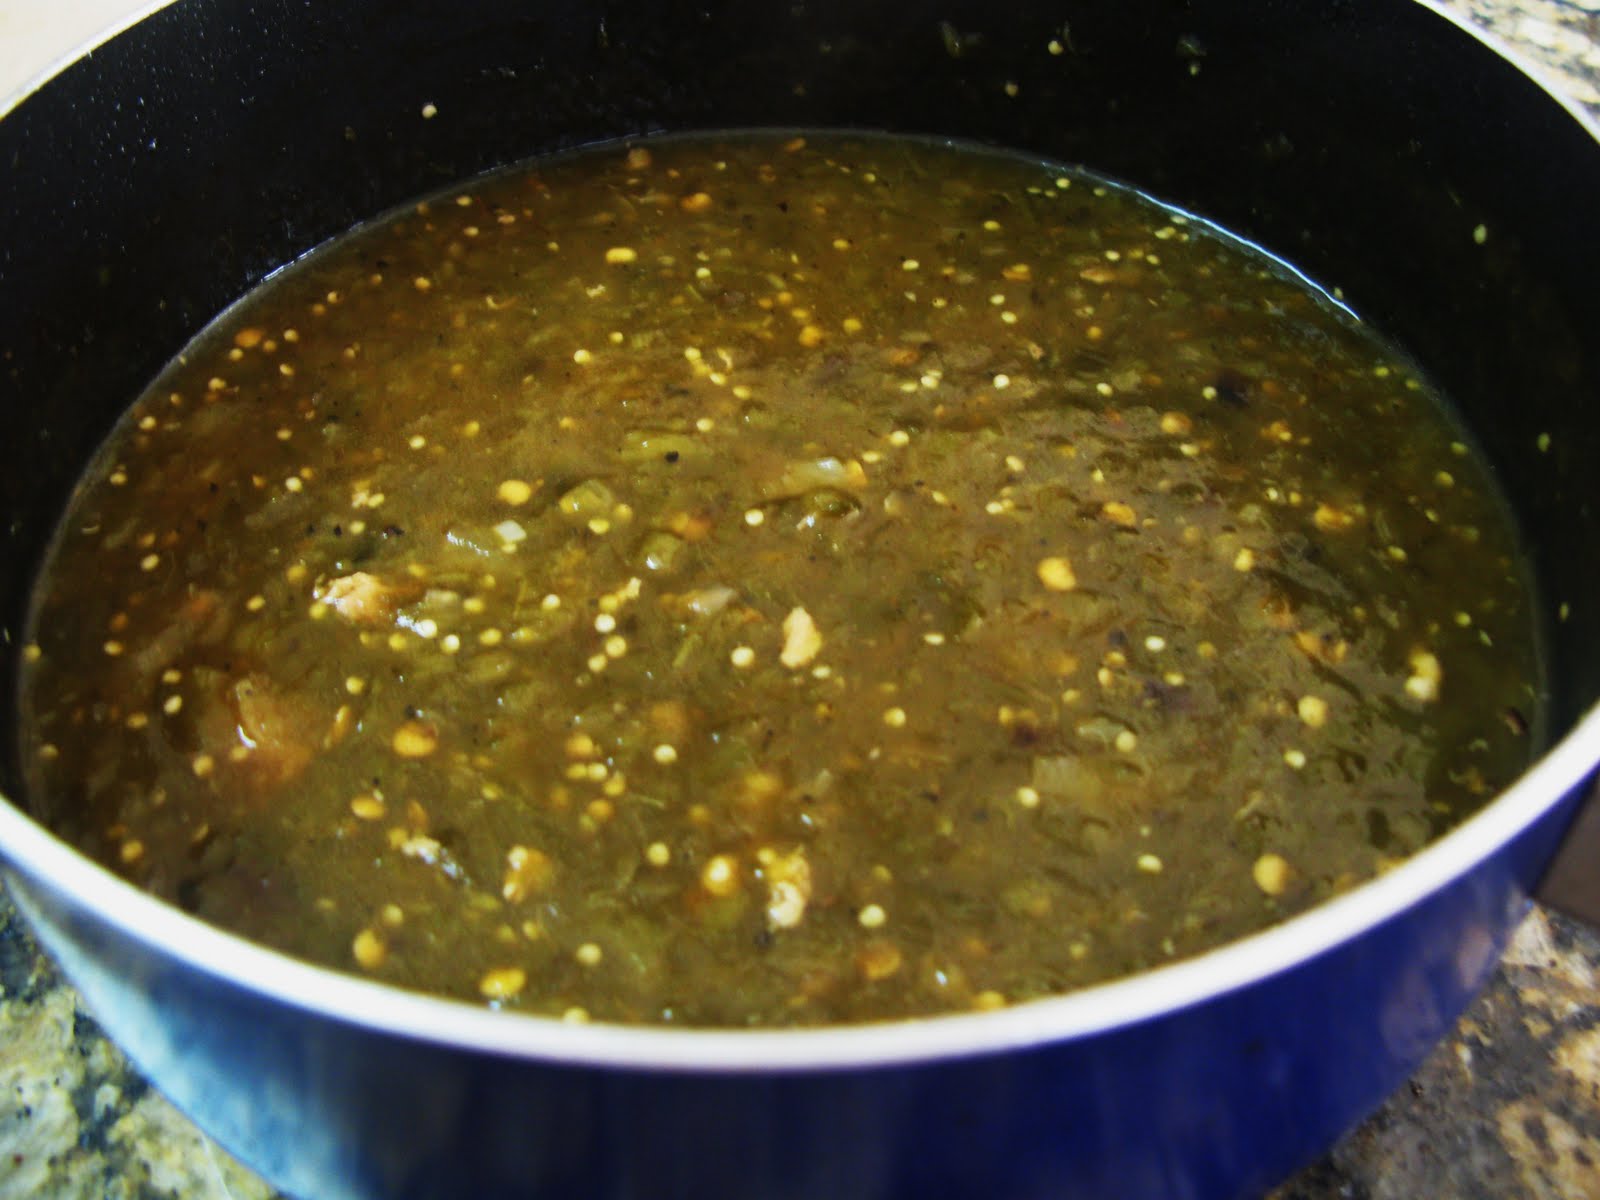
I have never made a homemade enchilada sauce and I was sooooo glad I did this month. It was delicious. Please don't get discouraged by the long recipe and steps. it was not difficult at all and worth your time. The hardest part for me was roasting the chilies and tomatillos simply because it is time consuming and have to watch them. The rest is a piece of cake. The only change I made to the recipe is that I boiled a whole chicken and make homemade broth and used the chicken for filling. In my opinion it is moister than grilled but others may prefer the grilled, smoky taste. Whatever float your boat! Changing things up is a big part of the COOKING FUN, isn't it????

Ingredients


1½ pounds Fresh Anaheim chilies (about eight 6 to 8 inch chilies) 24 ounces 678 grams - roast, peel, remove seeds, chop coarsely. Other green chilies (NOT bell peppers) could probably be substituted but be conscious of heat and size!)
7-8 ounces Tomatillos (about 4-5 medium)212 grams - peel, remove stems
4 cups Chicken broth (32 ounces/920 grams)
1 clove Garlic, minced
2 teaspoons yellow onion, minced
1 teaspoon dried oregano
½ tsp Kosher salt (add more to taste)
¼ tsp Black Pepper (add more to taste)
2 tablespoons Cornstarch (dissolve in 2 tablespoons water, for thickening)
Hot sauce, your favorite, optional
2 Boneless chicken breasts (you can also use bone-in chicken breasts or thighs)
3 tablespoons Olive oil or other neutral vegetable oil (use more as needed)
Kosher salt and pepper
12 Small Corn tortillas (5-6 inch/13-15 cm). (you can also use wheat tortillas or other wraps)
6 ounces grated Monterey Jack, 170 grams (other cheeses (cheddar, pepper jack, Mexican cheeses) can be used. Just be sure they melt well and complement the filling)
Cilantro for garnish, chopped and sprinkled optional

Directions:

Roasting Fresh Chilies

1. Coat each chili with a little vegetable oil. If you are doing only a couple chilies, using the gas stove works. For larger batches (as in this recipe), grilling or broiling is faster.
2. Lay the oiled chilies on the grill or baking sheet (line pan with foil for simpler clean-up). Place the grill or broil close to the element, turning the chilies so they char evenly. They should be black and blistered.
3. As they are completely charred (they will probably not all be done at once), remove them to a bowl and cover with plastic, or close up in a paper bag. Let them rest until they are cool.
4. Pull on the stem and the seed core MAY pop out (it rarely does for me). Open the chili and remove the seeds. Turn the chili skin side up and with a paring knife, scrape away the skin. Sometimes it just pulls right off, sometimes you really have to scrape it.
5. DO NOT RINSE! (this will wash off awesome flavors)

Green Chile Sauce

1. Put a medium saucepan of water on to boil and remove the papery outer skin from the tomatillos. Boil the tomatillos until soft, 5 to 10 minutes. You can also grill the tomatillos until soft.
2. Drain and puree in a blender or food processor.
3. Return the tomatillos to the saucepan along with the chicken broth, chopped green chilies, minced onion, oregano, garlic, salt and pepper.
4. Bring to a boil over medium-high heat and then reduce the heat and simmer for 10 minutes.
5. Add the cornstarch/water mixture and stir well. Simmer, stirring occasionally, until the sauce is thickened and reduced to 4-5 cups, another 10-15 minutes.
6. Adjust seasonings and add hot sauce if you want a little more heat.


Stacked Green Chile and Grilled Chicken Enchiladas

1. Heat a gas grill to medium high or build a medium-hot charcoal Coat the chicken with olive oil and season well with salt and pepper. Preheat oven to 450 degrees.
2. Grill the chicken until just cooked through, 4-5 minutes a side for boneless chicken breasts.
3. Cool and then slice into thin strips or shred.
4. In a small skillet, heat 3 tablespoons oil over medium-high heat until very hot. Dip the edge of a tortilla into the oil to check – it should sizzle immediately.
5. Using tongs, put a tortilla into the pan and cook until soft and lightly brown on each side, about 15-20 seconds per side (at the most).
6. Drain on paper towels.
7. Add oil as needed and continue until all 12 tortillas are done.


Note: The directions are for 12 totillas but my pictures will only show a single stack but you will get the idea.


In a baking dish, ladle a thin layer of sauce.


Lay tortillas in the dish and ladle another ½ cup (4 ounces/112 grams) of sauce over the tortillas. Divide half the chicken among the first layer of tortillas.


Top with another ½ cup of sauce.


And 1/3 of the grated cheese.


Stack another tortillas, top with the rest of the chicken, more sauce and another third of the cheese.


Finish with the third tortilla. Top with the remaining sauce and cheese.Bake until the sauce has thickened and the cheese melted, about 20 minutes. Let rest for 5-10 minutes.


. To serve, transfer each stack to a plate. Spoon any leftover sauce over the stacks and sprinkle with cilantro, if you wish. The stacks may also be cooked in individual gratin dishes.

Sunday, May 2, 2010

English Sticky Toffee Pudding


The April 2010 Daring Bakers’ challenge was hosted by Esther of The Lilac Kitchen. She challenged everyone to make a traditional British pudding using, if possible, a very traditional British ingredient: suet.
I chose to make a sweet version rather than savory and made sticky toffee pudding. i baked mine instead of steaming.

Steamed Suet Pudding, sponge type.

(100 grams/4 ounces) All-purpose flour
(1/4 teaspoon) salt
(1.5 teaspoons) Baking powder
(100 grams/4 ounces) breadcrumbs
(75 grams/3 ounces) Caster sugar
(75 grams/ 3 ounces) Shredded suet or suet substitute (i.e., Vegetable Suet, Crisco, Lard)
(1) large egg
(6 to 8 tablespoons) Cold milk

1. Sift flour, salt and baking powder into bowl.
2. Add breadcrumbs, sugar and suet.
3. Mix to a soft batter with beaten egg and milk
4. Turn into a buttered 1 liter/ 2pint pudding basin and cover securely with buttered greaseproof paper or aluminum foil.
5. Steam steadily for 2.5 to 3 hours (I baked mine @350 degree C for 35min)
6. Turn out onto warm plate, Serve with sticky toffee sauce.

Sticky Toffee Sauce

1 stick butter
1 C brown Sugar
1 C heavy Cream
1 tsp Vanilla