Showing posts with label Easy Dishes. Show all posts

Wednesday, August 7, 2013

Honey Jalapeno Cornbread


I have made cornbread many times and this one is by far my favorite. It's sweet and moist with just a bit of heat and flavor from the honey and jalapenos. I made collard greens and wanted some cornbread with them so I searched for jalapeno cornbread recipes since I had two leftover in my fridge.
I saw iowagirleats recipe on Pinterest and modified it. Thank you Iowa girl for the recipe. I loved it. She uses unsweetened apple sauce but I used regular apple sauce which is what I had. Therefore, I may reduce the sugar next time to be more savory and less sweet but it was delicious the way it was. I didn't have butter either so I used olive oil and it turned out just fine and moist. I plan to just use olive oil next time too. Also since I used regular apple sauce it was already sweet enough that we didn't need more honey to drizzle


Ingredients:
1/4 cup olive oil
1/4 cup applesauce
1/4 cup sugar (will reduce or omit this next time)
1/4 cup honey
2 jalapenos, seeded and diced
2 eggs, beaten
1 cup low-fat buttermilk ( I used 1 TBS lemon juice and fill up one cup with whole milk )
1 cup cornmeal
1 cup flour
1/2 teaspoon salt
1/2 teaspoon baking soda
Directions: 
  1. Preheat oven to 375 degrees. Spray an 8×8 or equivalent sized baking dish well with nonstick spray then set aside. In a large bowl, whisk together olive oil and applesauce. Add sugar and honey then whisk to combine.  Add eggs and buttermilk (or sour milk) then whisk to combine.
  2. In a separate bowl, stir together cornmeal, flour, salt, and baking soda. Whisk into dry ingredients in two batches. I took some batter out to make a mild version the added jalapeno to the rest of the batter.
  3. Pour mixture into prepared baking dish then bake for 30-35 minutes, or until a toothpick inserted into the center comes out clean.


 Below is a non spicy version in cute littles ramekins I made before I added jalapenos for my baby girl so it wont be too hot for her. She loved them. They were only in the oven for about 22 minutes since they were smaller and baked faster.


Monday, August 5, 2013

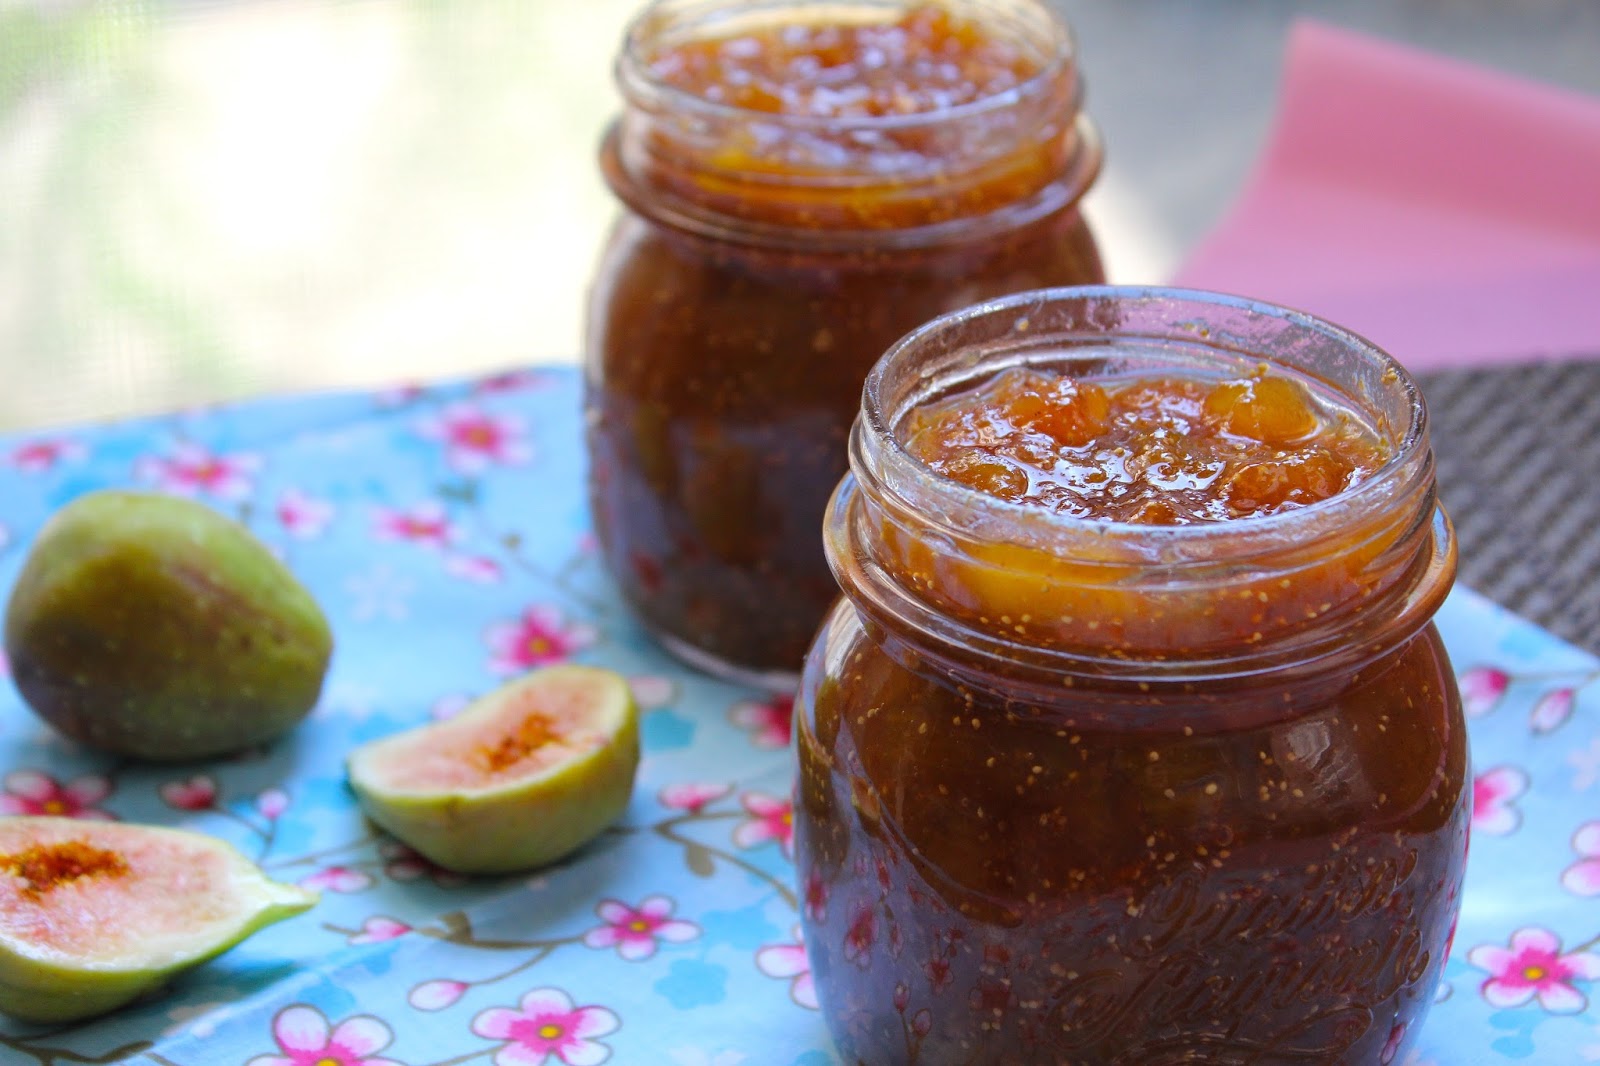
Homemade Fig Preserves


Figs are truly a rare treat whether you enjoy them fresh or preserved. There are so many varieties of figs and I am not sure what kind of figs my in laws have but I was lucky enough to receive tons and tons of figs this year from their tree. They are greenish on the outside with pink flesh inside. We had fun picking them before the birds get to them. I made several jars of preserves to keep and to give away.


Fig Preserves Recipe

Makes 3-4, 8 oz jars

Prep time 35-40 minutes
Cook time about 1 1/2 hour
  • 8 Cups whole fresh figs
  • 2 tsp baking soda
  • 2 Cups granulated sugar
  • 1tsp minced ginger or powder
  • 1/2 tsp cinnamon
  • 1/2 tsp vanilla extract 
  • Zest and juice from 1 Lemon
  • Hot tap water
Directions:

  • Dissolve the baking soda in hot tap water, and gently stir to wash the figs in it.
  • Then rinse the figs thoroughly with fresh cool water. 
  • Slice figs in half. (leave whole for whole fig preserves)
  • In a large stock or canning pot, combine figs, sugar, lemon juice, lemon zest, ginger and 1 cup hot tap water bring to a boil stirring frequently. ( I used a Dutch oven)
  • Note: if using whole fruit gently stir in order no to break fruit.
  •  Reduce heat and continue cooking until mixture is thick and gooey. (about an hour)
  • I also cut the figs more while they are still in the pot with shears towards the end to get smaller pieces.
  • Add cinnamon and vanilla in the last 20 min of cooking.
  • Watch closely in the last few minutes to keep bottom from burning
  •  Fill sterilized jars with hot preserves leaving 1/4 inch head space and cover with clean tops and rims cook in a hot water bath for 15 minutes. Follow manufacturer's canning instructions for more details in canning. 
  • Open jars can be kept up to a month in the refrigerator.


The fun part now that I have all the preserves in the jars is to decorate and give them as gifts. These make great gifts and many people love fig jam. I used brown paper, some pretty scrap booking paper and bakers twine to decorate the jars. My daughter helped me with the decorating part and we had a great time.


I enjoy my preserves on a piece of toasted crusty rustic bread with some mascarpone or cream cheese. It should be yummy on a bagel or on an english muffin as well. How about on pizza with some goat cheese? I will have to try that soon.

Monday, July 1, 2013

Fresh Basil Pesto Pasta

Fresh Basil Pesto

Every year I have basil plants in my garden that reseed themselves and come back. I went out to my garden and picked fresh basil leaves and made this simple and delicious pesto. Pine nuts are pricey but you only need a little bit and won't break your bank. Also, you can substitute with walnuts or macadamia nuts. I have different kinds od basil plants and I used a variety of basil such as sweet basil, Thai basil. 

I got this recipe from the post of Elise Bauer from simplyrecipes.com. I made hardly any changes to the recipe.

INGREDIENTS

  • 2 cups fresh basil leaves, packed
  • 1/2 cup freshly grated Parmesan-Reggiano or Romano cheese
  • 1/2 cup extra virgin olive oil ( I used a little more ..3/4 cup instead)
  • 1/3 cup pine nuts or walnuts (Macadamia nuts also yummy)
  • 3 medium sized garlic cloves, minced
  • Salt and freshly ground black pepper to taste
  • Special equipment needed: A food processor 

METHOD

1 Combine the basil in with the pine nuts, pulse a few times in a food processor. (If you are using walnuts instead of pine nuts and they are not already chopped, pulse them a few times first, before adding the basil.) Add the garlic, pulse a few times more.
2 Slowly add the olive oil in a constant stream while the food processor is on. Stop to scrape down the sides of the food processor with a rubber spatula. Add the grated cheese and pulse again until blended. Add a pinch of salt and freshly ground black pepper to taste.
Serve with pasta, or over baked potatoes, or spread over toasted baguette slices.

Yield: Makes 1 cup. 

Pesto Pasta with Grilled Chicken


The above pasta dish is so simple and quick, I had to share! 

Just toss some cooked and drained pasta with the fresh pesto. Throw some grilled chicken or shrimp on top and ENJOY!!


Tuesday, June 4, 2013

Thai Coconut Sticky Rice and Mango ข้าวเหนียวมะม่วง


For most Asian families, it is common to have fruits at the end of a meal as desert. I grew up eating fruits as desert often and this is one my favorite Asian sweet treats with fruit! Being Asian and a rice lover, I can't get enough of this simple Thai desert consists of yummy sticky rice soaked with sweet aromatic coconut milk, and topped with a very tropical fruit, mango. What a Genius idea to put all the very common ingredients of the tropical South East Asia together in a sweet way.

The recipe I use is below and it is easy to follow. It is also from one of my favorite Thai food blogs so check it out!

Recipe:

Author: 

Prep time:  
Cook time:  
Total time:  
Serves: 2
Ingredients
  • ½ cup raw Thai sticky rice (no substitute), soaked for 10 minutes, drained, and rinsed to get rid of excess starch ( I soak my rice for at least 2 hours)
  • ½ cup good coconut milk
  • ½ cup sugar
  • ½ teaspoon salt
  • One perfectly ripe good mango (preferably Ataulfo), peeled and cut into thick slices
Directions
  1. Put the rice in a heatproof bowl and steam in a steamer, over medium heat, for about 20 minutes (based on one half cup of rice). The rice should be cooked through with no hard, raw bits in the middle of the grains. You can also cook the sticky rice without a steamer, using the splatter guard method.
  2. Turn off the heat and let the rice stay in the steamer, with the lid on, while you prepare the coconut milk.
  3. In a heatproof bowl, heat the coconut milk, sugar, and salt in the microwave on high for 2 minutes. The sugar should completely dissolve and the mixture should be very hot.
  4. Take the sticky rice out of the steamer. Pour the hot coconut mixture on top of the rice and gently stir. (It may look like your rice is drowned in coconut water, but the liquid will all be absorbed.) Cover the bowl tightly with plastic wrap and let the mixture stand at room temperature, undisturbed, for half an hour.
  5. The coconut sticky rice is to be served at room temperature along with fresh mango. The sesame seeds are optional.
  6. The rice can be refrigerated and reheated in the microwave, but the texture of reheated sticky rice isn’t as good as it is when freshly made. Freezing sticky rice is not recommended.
It is really best served warm after making it rather than re heated.


Tuesday, February 19, 2013

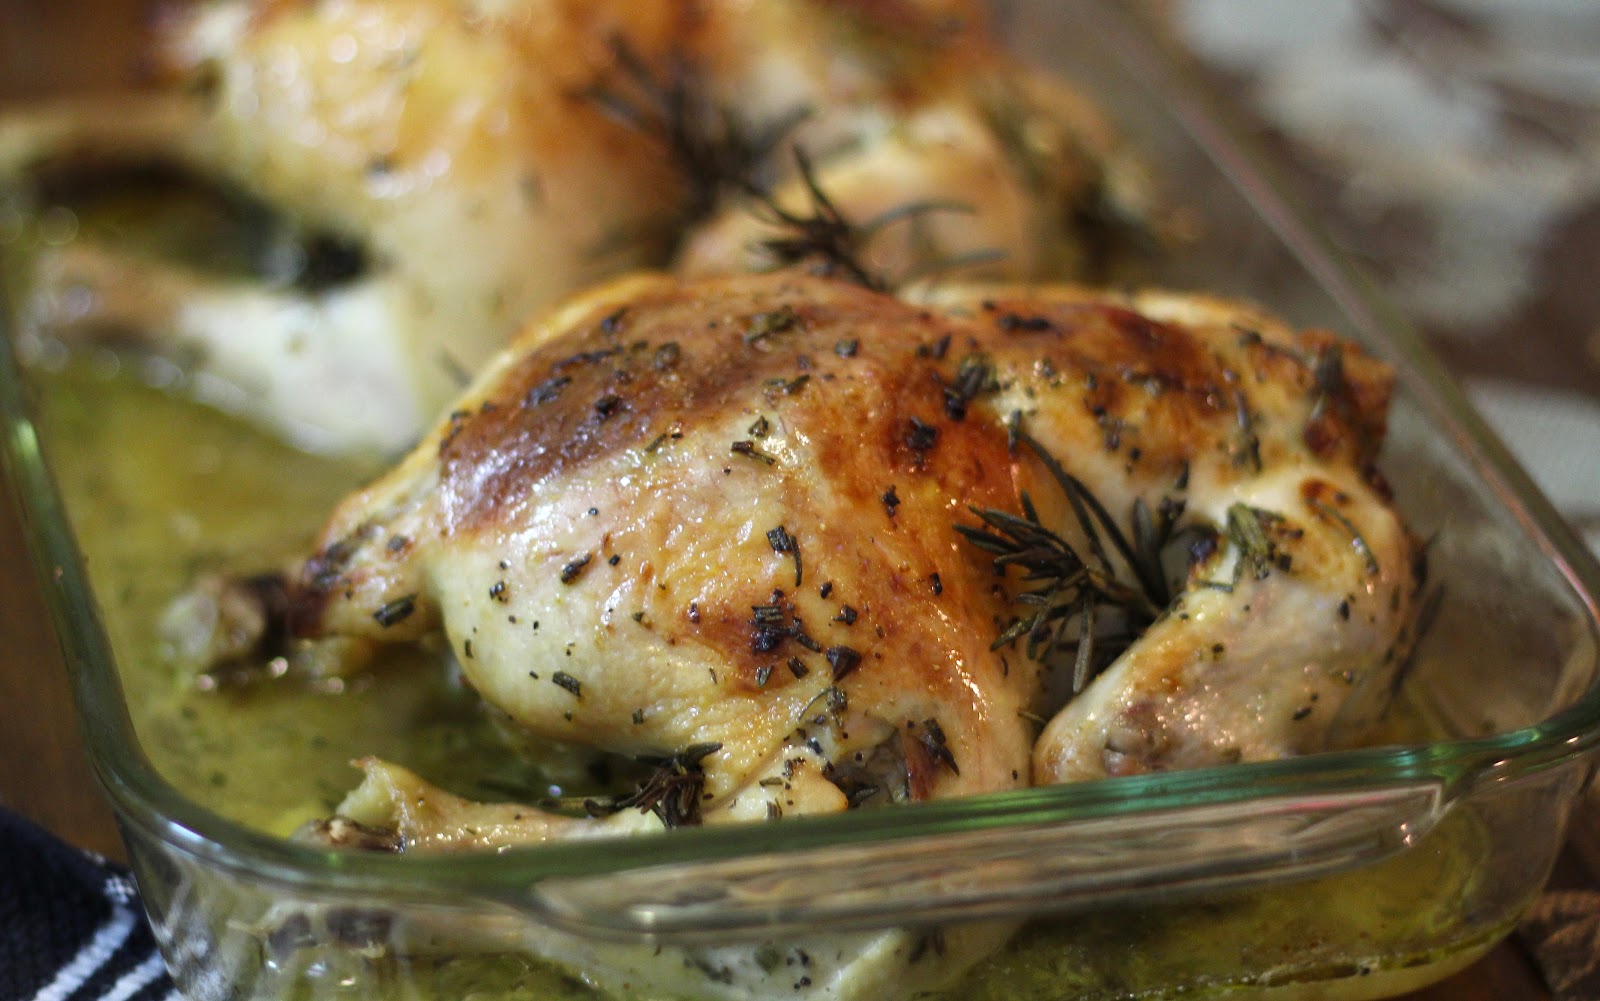
Lemon Rosemary Chicken


This is such an easy dish to make. My family loves it and I love making it for them. I also have a huge bush of rosemary which makes it easier for me. No brining needed and it is juicy and delicious. I made two tonight since my family needs more than one!
Please feel free to try out the recipe below and let me know how it turns out for you.


Ingredients

1( 3-4 lb) chicken (fresh, never been frozen)
1 lemon
4-6 sprigs of fresh rosemary
4 cloves of garlic, peeled 
1-2 TBS olive oil
salt and peeper to taste (or you can use lemon pepper)
1/4 C water

Preheat the oven to 350 degrees.

Finely dice about 1 TBS rosemary and save the rest.
In a small bowl, squeeze 1 lemon (save the rind), add olive oil and diced rosemary. Mix well.
Rub the whole chicken with salt and pepper (or lemon pepper). Then rub again with lemon oil mixture.
Insert whats left of the lemon (the rind) inside the chicken cavity along with some rosemary sprigs and a garlic clove. Then place the rest of the rosemary sprigs and garlic in various parts of the chicken such as under the wings etc.
Place the chicken in a pan with 1/4 C water and bake uncovered for 1 hour 15 min, breast side down. Let it rest for 10-15 minutes before eating the whole thing!!


Friday, February 15, 2013

Marinated Cheese


Look how pretty and colorful this easy dish is! The name sounds interesting as well. This simple appetizer was introduced to me at a holiday party a few years ago and my friend was nice enough to share the recipe. This yummy recipe is a keeper for certain and I am sharing it with you for you and family or friends to enjoy!


Ingredients


1/2 cup olive oil

1/2 cup white wine vinegar

1 (2 ounce) bottle diced pimento, drained

3 tablespoons chopped fresh parsley

3 tablespoons minced green onions

3 cloves garlic, minced

1 teaspoon sugar

3/4 teaspoon dried basil

1/2 teaspoon salt

1/2 teaspoon ground black pepper

1 (8 ounce) package Cheddar cheese

1 (8 ounce) package cream cheese, cold

Directions

In a jar with a tight fitting lid, combine the olive oil, wine vinegar, pimento, parsley, green onion, garlic, sugar, basil, salt and pepper. Shake vigorously to blend. Set aside.

Cut the block of Cheddar cheese in half lengthwise. Cut crosswise into 1/4 inch slices to form squares. Repeat with cream cheese. Arrange cheese squares alternately in a shallow baking dish with slices standing on edge. You can arrange in a single long row, or 2 parallel rows depending on the size of your dish. Pour the marinade from the jar over the cheese slices, cover and refrigerate for at least 6 hours, or overnight.

To serve, remove slices to a serving platter so they are still arranged in an alternating pattern. Spoon some of the extra marinade over the cheese, and serve with crackers.


Saturday, September 3, 2011

Apple Walnut Gorgonzola Turnovers

I love gorgonzola cheese and was searching for recipes that use this cheese for a party. I found several recipes that sounded good but I chose to make these mini turnovers from simply recipe because I love the combination of apples, gorgonzola and honey. They turned out well and we enjoyed them. I will make this again and when I do, I will put a little more gorgonzola than the original recipe calls for. The combination of the sweetness of honey and apples, the crunchy walnuts and the cheese was AWESOME!


Recipe:

If using prepared frozen puff pastry sheets, they need to be defrosted in the refrigerator at least 3 hours before using.

Ingredients
* 1 1/2 cups peeled, cored, chopped apples (use a good cooking apple such as Jonagold, Pippin, Granny Smith, Jonathan, Golden Delicious, Gravenstein, Mcintosh)
* 1/2 cup chopped walnuts
* 1/4 cup crumbled gorgonzola cheese
* 2 teaspoons chopped fresh thyme leaves (or 1/2 teaspoon dried thyme, crumbled)
* 2 Tbsp honey
* 2 7-ounce prepared puff pastry sheets (total 14 ounces)
* 1 egg, beaten

Method

1 Place chopped apples in a bowl, microwave on high heat for 5 minutes until apples are cooked through. Remove from heat and let cool. Drain excess moisture. Once cooled, chop further so that the pieces are between 1/4-inch and 1/2-inch square. (Note you can skip this step if you want; the main purpose is to get the apples to release some of their moisture before cooking into the pastry.)

2 Combine apples, walnuts, gorgonzola, thyme and honey in a small bowl.


3 Preheat oven to 400°F. Working with one puff pastry sheet at a time (leave the second one in the refrigerator until using it) roll out the pastry to a size of 9-inches by 12-inches. Cut into 12 3x3-inch squares (a pizza slicer works great for this). Paint 1/2-inch of border around each square with beaten egg (this will help the pastry seal). Place a heaping teaspoon of the apple walnut mixture in the center of the squares. Fold over the squares into a triangle shape, stretching the dough if necessary to cover the filling. Use the tines of a fork to crimp the edges. Place triangles on a silpat or parchment paper lined baking sheet, with space between the triangles. Chill for 5 minutes in the refrigerator before baking, or chill while you prepare the second puff pastry sheet.

4 Whisk in a half teaspoon of water into the remaining beaten egg. Use a pastry brush to paint on the tops of the pastry triangles for a nice glaze. ( I sprinkled some sea salt on the top too). Place in oven and cook for 15-20 minutes until nicely puffed up and lightly browned. Allow to cool for at least 20 minutes before serving.

Makes 24 turnovers. Serve either warm or at room temperature. Can be made several hours in advance.

Friday, June 17, 2011

Fresh Basil Pesto...Straight from my garden :)


Oh what a delicious way to use up all the basil I have in my garden! I am so delightful that I found this fantastic pesto recipe from Simply Recipe. I used some of this pesto in
my chicken pesto florentine and my family quickly ate the rest as an appetizer with some bread while I was making the pasta dish. I did add a little more olive oil than what the recipe called for but I am sure it is fine the way it is too. Pine nuts are expensive and I have heard that using macadamia nuts instead is also delicious. I am not sure how much money you will save though. This little one cup of pesto can get pricy especially if you have to buy everything, but I was able to use my basil from the garden. I made sure the olive oil and the parmesan were also good quality. next time I will try it with Romano cheese to see which one I prefer. This recipe requires a food processor but there are recipes that do not. I will never buy pesto again!!!

Fresh Basil Pesto

Yield: Makes 1 cup.

Ingredients

2 cups fresh basil leaves, packed
1/2 cup freshly grated Parmesan-Reggiano or Romano cheese
1/2 cup extra virgin olive oil
1/3 cup pine nuts or walnuts
3 medium sized garlic cloves, minced
Salt and freshly ground black pepper to taste

Equipment needed: A food processor

Directions:


Combine the basil in with the pine nuts, pulse a few times in a food processor. (If you are using walnuts instead of pine nuts and they are not already chopped, pulse them a few times first, before adding the basil.) Add the garlic, pulse a few times more.

Slowly add the olive oil in a constant stream while the food processor is on. Stop to scrape down the sides of the food processor with a rubber spatula. Add the grated cheese and pulse again until blended. Add a pinch of salt and freshly ground black pepper to taste.

Serve with pasta, or over baked potatoes, or spread over toasted baguette slices.

Wednesday, May 18, 2011

Easy Chicken Marsala

I like chicken, I like mushrooms and I LOVE this easy yummy chicken Marsala! I am not sure what the best thing is to serve this with but usually, I serve it with some angel hair pasta or sometimes mash potatoes. I have not tried making this in a larger quantity but I would like to try soon. There are many recipes floating on the Internet for this dish and I use this recipe from Allrecipes and it was awesome. The recipe did not say whether to use sweet Marsala or the dry but I used the sweet one. Also, I butterflied the chicken breast, put them in between two sheets of clear wrap and pounded them to 1/4 inch thick before cutting them a little bit smaller. It was such a quick and easy delicious recipe with simple ingredients. I am keeping this recipe!!Would you like to try it too?

Here is the recipe:

Ingredients:

1/4 cup all-purpose flour for coating
1/2 teaspoon salt
1/4 teaspoon ground black pepper
1/2 teaspoon dried oregano
4 skinless, boneless chicken breast halves - pounded 1/4 inch thick
4 tablespoons butter
4 tablespoons olive oil
1 cup sliced mushrooms (I used 8oz pre sliced baby Bella mushrooms)
1/2 cup Marsala wine
1/4 cup cooking sherry

Directions:

In a shallow dish or bowl, mix together the flour, salt, pepper and oregano. Coat chicken pieces in flour mixture.
In a large skillet, melt butter in oil over medium heat. Place chicken in the pan, and lightly brown. Turn over chicken pieces, and add mushrooms. Pour in wine and sherry. Cover skillet; simmer chicken 10 minutes, turning once, until no longer pink and juices run clear.

Nutritional Information

Amount Per Serving: Calories: 448 | Total Fat: 26.6g | Cholesterol: 99mg

Sunday, January 2, 2011

Bread Pudding with Rum Sauce

Bread pudding is another easy desert with endless variations fruits or flavors or sauces one can think of. Banana bread pudding, chocolate bread pudding, rum sauce, caramel sauce, whiskey sauce, with raisins or without....the list goes on and on. I enjoy many different kinds of bread pudding and I will share a basic bread pudding with rum sauce recipe here. they are from two different sources. The bread pudding is from grouprecipes but I do not remember where I found the sauce recipe. I searched for hours on the Internet to remember where I got it so I can give the proper credit but unfortunately I wasn't able to:(

Ingredients For The Bread Pudding

4 Cups scalded milk
3 Cups cubes of day old or toasted French bread
1 3/4 Cups sugar
1 TBS butter
1/4 tsp salt
4 eggs slightly beaten
1 tsp vanilla

Directions:

Soak bread in 2 cups of the hot milk for 5 minutes.
Put in greased pan.
Add the other 2 cups of scalded milk, butter, eggs, and sugar.
Add vanilla.
Mix well and slowly pour over bread mixture.
Bake 350 degrees for 45 min to 1 hour.

Ingredients for Rum Sauce

3/4 cup sugar
2 TBS flour
1 cup water
1/4 C heavy cream (optional)
1 stick butter
1/2 tsp vanilla
3 TBS rum

Directions:

Combine flour, water, sugar and butter in a sauce pan.

Cook over medium heat until mixture begins bubbling. Add the cream, keep stirring for one minute.

Remove from heat and add the vanilla and rum. Mix well. You are done.

Pour the rum sauce over the entire bread pudding or over each individual serving.

Note: I used raisins to garnish (optional).

Friday, October 22, 2010

Omelette Roll Slices


Most of us know how to make an omelette. Here is a recipe of an omelette with a cute twist to it! The twist is that it is made into a roll and then sliced, that's all! You can put anything you like just like a regular omelette. Today, I put some onions and mushrooms. I usually put finely diced onion, carrots, and roasted seaweed (Korean or Japanese). Noone taught me how to make this, but I first ate an omelette in a roll and sliced from a Korean grocery store. I liked it and started making them as a side dish because they are easy, pretty, and TASTY!


Basic Recipe: (change it up by all means!)

2-3 eggs, beaten
about 1/2 C finely diced onion, carrots or any veges of your choice

Mix the veges and egg. Pour it in a slighly greased skillet. Cook for a few min till you can roll it in tight roll. Let it cool and slice. They are so pretty!

Click here for a good website that shows step by step pictures if you want to see good pictures and how to fold etc.

Monday, June 7, 2010

Manila Clams in Blackbean Sauce

I am a seafood lover...especially when they are live and fresh. I found these live Manila clams from my local Asian market today and bought about a pound and a half. The tip for picking good clams is to pick the ones that are completely closed. Also, they should open when they are cooked and the ones that don't open are bad and should not be eaten. Clams can be cooked many different ways but I like clam soup and stir fried clams in blackbean sauce. Here is my easy recipe:

1.5 lb Manila clams
1 TBS finely sliced ginger
1 TBS blackbean sauce, see pic
1/2 C Cooking wine
1 TBS soy sauce
1 TBS oil
1 tsp sugar
1/4-1/2 C water
pinch of salt
green onions for garnish (optional)

Heat up the oil in a wok and add the ginger. After 30 sec or so add the clams and the rest of the ingredients. Stir fry till the clams open. Can cover and steam to cook quicker as well.


Sunday, June 6, 2010

Grilled Scallops with Basil Stuffing

This is one of my newly found favorite seafood recipes. I made this for iheartcookingclubs and I picked this Mark Bittman's recipe for this week's "Herb Garden" theme. We have been cooking with Mark Bittman for sometime now but I havn't had a chance to participate till now. This recipe is so delicious, quick, and easy. I wanted to find larger scallops but these worked out just fine for me. The sweetness of the scallops and the tasty herb stuffing goes so well together and I will be making this again and again. Here is the recipe:

1/2 cup fresh basil leaves
1 clove garlic
1 teaspoon salt
1/4 teaspoon freshly ground black pepper
1/3 cup plus 1 tablespoon extra-virgin olive oil
1 1/2 pounds or more large sea scallops

Mince the basil, garlic, salt and pepper together until very fine, almost a puree (you can do this in a food processor, but it really won't save you time or effort). Mix in a small bowl or cup with 1 tablespoon of the olive oil.

Make a deep horizontal slit in the side of each of the scallops, but don't cut all the way through. Fill each scallop with about ? teaspoon of the basil mixture; close. Pour the remaining oil onto a plate or pan and turn the scallops in it. Let sit while you preheat a gas grill or start a charcoal fire; it should be very hot before grilling, with the rack about 4 inches from the heat source.

Place the scallops on the grill (don't pour the remaining oil over them, as it will catch fire), and grill 2 to 3 minutes per side, no more. Serve immediately, with lemon wedges.


The basil stuffing.


Stuffed scallops.


I did mine in a cast iron skillet on the stove instead of grilling to save time.


Browned and ready to eat scallops.


Delious!!! I was thinking how wonderful this would be if paired with the right wine.....

Sunday, March 21, 2010

Monkey Bread

Have you heard of Monkey Bread before? I haven't until I started my current job a few years back. It is so easy to make yet yummy. If you like Cinabon or Cinnamon rolls, you'll love this. It's great for breakfast but good all day long as well. This is the best when you first take it out of the oven and eat while it's still hot. My friend Becky from work gave me her recipe verbally and i modified it just a tiny bit from what I remember. Here is a super easy Monkey Bread recipe that you may add to your sweet recipes collection:

3 regular size biscuit tubes
1 stick butter
1 Cup brown Sugar
1 tsp Vanilla
1/3 C sugar, approximate
2 tsp cinnamon, approximate

Pre heat oven to 350 degree C.

Biscuits.


Quarter each biscuits.


Melt butter and brown sugar in a pan over medium heat.


Mix sugar and cinnamon.


Toss biscuits in sugar and cinnamon mixture in a bowl till well coated.


Put the biscuits in a greased Bundt pan.


Pour in the butter brown sugar sauce. Stick it in the oven for 30 min@ 350.


Enjoy!!!

Tuesday, March 9, 2010

Broccolini Beef in Garlic Sauce

According to wiki " Broccolini is a green vegetable similar to broccoli but with small florets and long, thin stalks. Although often misidentified as young broccoli, it is a cross between broccoli and kai-lan, Chinese broccoli. A natural hybrid of the cabbage family Brassica oleracea, it was developed by the Sakata Seed Company of Yokohama, Japan. Broccolini's flavor is sweet, with notes of both broccoli and asparagus." I like broccoli and Asparagus, but I LOVE Broccolini. Most people also like Broccoli and Beef. This dish is Broccolini and Beef in a garlic sauce. Try and see how yummy it is! Here is the recipe:

1/2 lb tender beef, cut in small pieces
1 TBS each of oyster sauce, soy sauce, and sweet cooking wine or seasoning
1 Bunch Broccolini
1 TBS minced garlic
1 TBS oil

Look How PRETTY!!!
Seasonings to marinate beef.
Marinate beef with the above 3 seasonings.
Wash your Broccolini.
Cut and separate flowers from stems. Split stems in half.
Heat garlic and oil till garlic sizzles.
Add beef first.
Add stems. Cook a few min.
Add flowers last since they are most tender and you don't want to over cook them.
Ready!
Serve with rice!