Showing posts with label Fruit. Show all posts

Monday, August 5, 2013

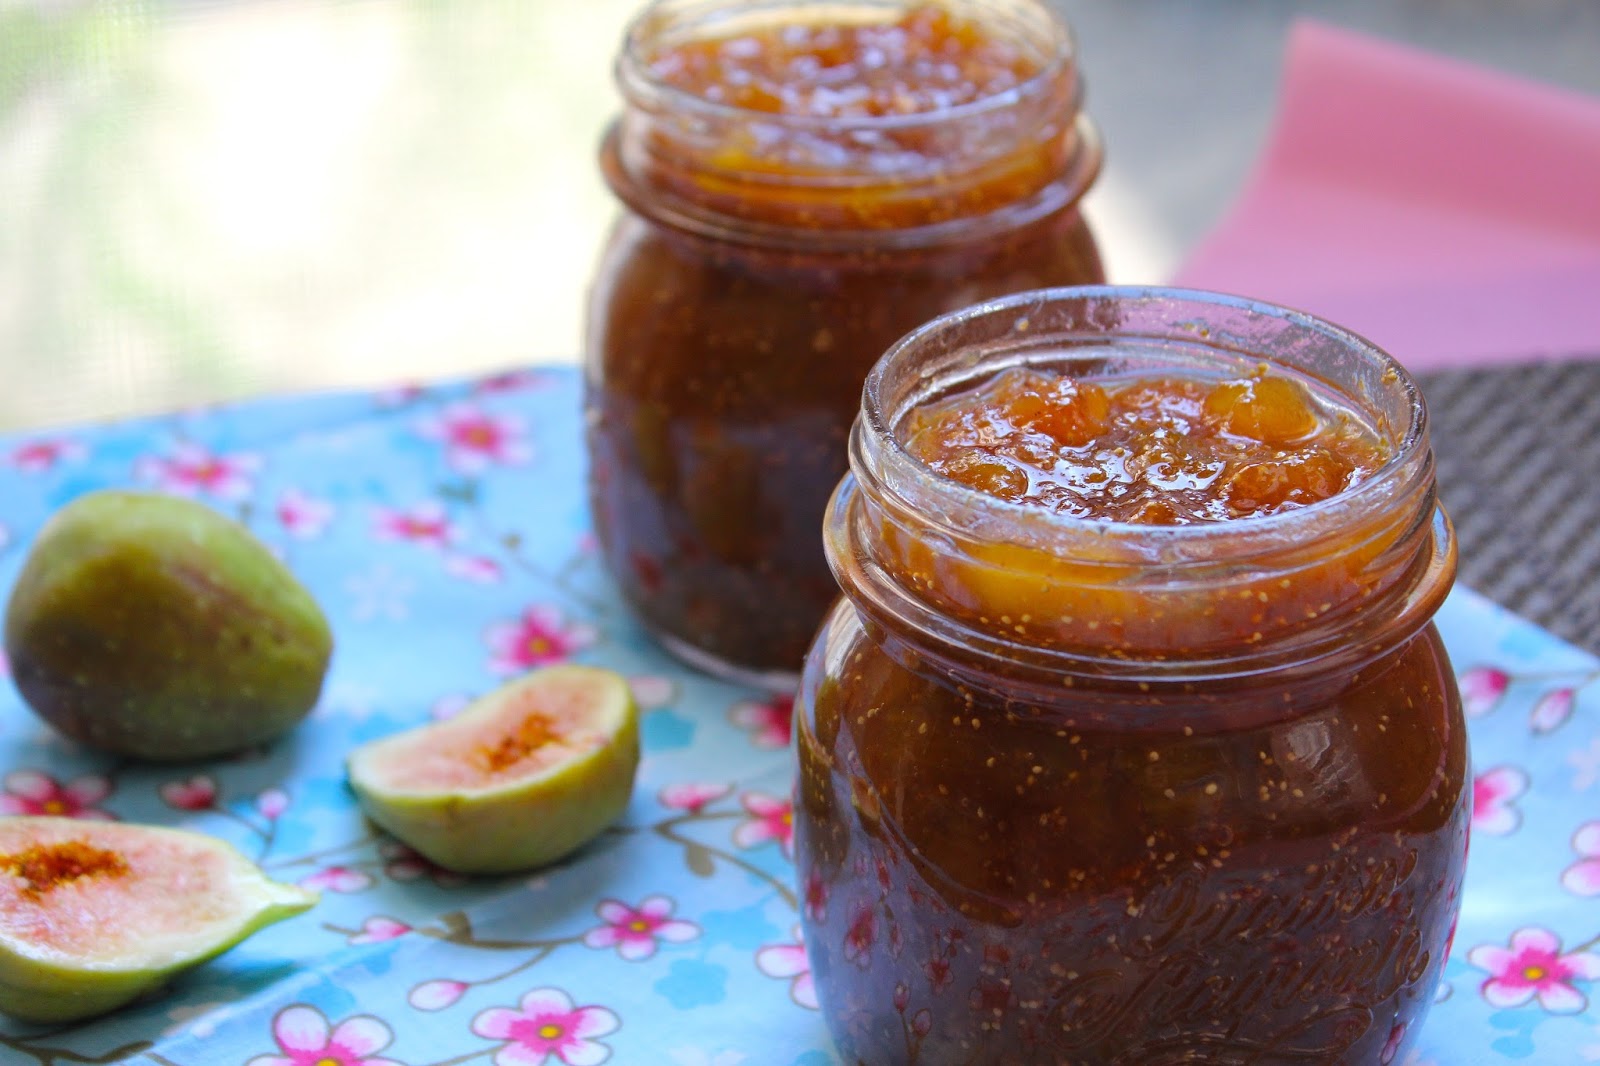
Homemade Fig Preserves


Figs are truly a rare treat whether you enjoy them fresh or preserved. There are so many varieties of figs and I am not sure what kind of figs my in laws have but I was lucky enough to receive tons and tons of figs this year from their tree. They are greenish on the outside with pink flesh inside. We had fun picking them before the birds get to them. I made several jars of preserves to keep and to give away.


Fig Preserves Recipe

Makes 3-4, 8 oz jars

Prep time 35-40 minutes
Cook time about 1 1/2 hour
  • 8 Cups whole fresh figs
  • 2 tsp baking soda
  • 2 Cups granulated sugar
  • 1tsp minced ginger or powder
  • 1/2 tsp cinnamon
  • 1/2 tsp vanilla extract 
  • Zest and juice from 1 Lemon
  • Hot tap water
Directions:

  • Dissolve the baking soda in hot tap water, and gently stir to wash the figs in it.
  • Then rinse the figs thoroughly with fresh cool water. 
  • Slice figs in half. (leave whole for whole fig preserves)
  • In a large stock or canning pot, combine figs, sugar, lemon juice, lemon zest, ginger and 1 cup hot tap water bring to a boil stirring frequently. ( I used a Dutch oven)
  • Note: if using whole fruit gently stir in order no to break fruit.
  •  Reduce heat and continue cooking until mixture is thick and gooey. (about an hour)
  • I also cut the figs more while they are still in the pot with shears towards the end to get smaller pieces.
  • Add cinnamon and vanilla in the last 20 min of cooking.
  • Watch closely in the last few minutes to keep bottom from burning
  •  Fill sterilized jars with hot preserves leaving 1/4 inch head space and cover with clean tops and rims cook in a hot water bath for 15 minutes. Follow manufacturer's canning instructions for more details in canning. 
  • Open jars can be kept up to a month in the refrigerator.


The fun part now that I have all the preserves in the jars is to decorate and give them as gifts. These make great gifts and many people love fig jam. I used brown paper, some pretty scrap booking paper and bakers twine to decorate the jars. My daughter helped me with the decorating part and we had a great time.


I enjoy my preserves on a piece of toasted crusty rustic bread with some mascarpone or cream cheese. It should be yummy on a bagel or on an english muffin as well. How about on pizza with some goat cheese? I will have to try that soon.

Wednesday, July 17, 2013

Southern Peach Cobbler


Its summer time and peach season. My wonderful neighbor and friend went to a local orchard and brought back some super sweet peaches for me. I turned to the world of Internet and stumbled upon this yummy peach cobbler recipe from Allrecipes. I like this recipe better than the Paula Dean's I used before. The peaches I had were small peaches so I used 10 instead of eight. Next time I do want to add a few more peaches to get more fruit filling since it cooked down as it baked.

I do think that the peaches you use make a big difference. I have now been spoiled with the delicious TX peaches from Ham Orchard in Terrell, TX and don't want to ever eat store bought or can peaches again!
Also vanilla ice cream is a must to go with your warm peach cobbler. I will save the homemade vanilla ice cream recipe for another post.


Here is the recipe:

Ingredients:

8 big fresh peaches - peeled, pitted and
sliced into thin wedges
1/4 cup white sugar
1/4 cup brown sugar
1/4 teaspoon ground cinnamon
1/8 teaspoon ground nutmeg
1 teaspoon fresh lemon juice
2 teaspoons cornstarch

Topping

1 cup all-purpose flour
1/4 cup white sugar
1/4 cup brown sugar

1 teaspoon baking powder

1/2 teaspoon salt
6 tablespoons unsalted butter, chilled and
cut into small pieces
1/4 cup boiling water

Mix together:
3 tablespoons white sugar
1 teaspoon ground cinnamon


1. 


Directions:

Preheat oven to 425 degrees F (220 degrees C).
2.In a large bowl, combine peaches, 1/4 cup white sugar, 1/4 cup brown sugar, 1/4 teaspoon cinnamon, nutmeg, lemon juice, and cornstarch. Toss to coat evenly, and pour into a 2 quart baking dish. Bake in preheated oven for 10 minutes.
3.Meanwhile, in a large bowl, combine flour, 1/4 cup white sugar, 1/4 cup brown sugar, baking powder, and salt. Blend in butter with your fingertips, or a pastry blender, until mixture resembles coarse meal. Stir in water until just combined.
4.Remove peaches from oven, and drop spoonfuls of topping over them. Sprinkle entire cobbler with the sugar and cinnamon mixture. Bake until topping is golden, about 30 minutes.

Tuesday, June 4, 2013

Thai Coconut Sticky Rice and Mango ข้าวเหนียวมะม่วง


For most Asian families, it is common to have fruits at the end of a meal as desert. I grew up eating fruits as desert often and this is one my favorite Asian sweet treats with fruit! Being Asian and a rice lover, I can't get enough of this simple Thai desert consists of yummy sticky rice soaked with sweet aromatic coconut milk, and topped with a very tropical fruit, mango. What a Genius idea to put all the very common ingredients of the tropical South East Asia together in a sweet way.

The recipe I use is below and it is easy to follow. It is also from one of my favorite Thai food blogs so check it out!

Recipe:

Author: 

Prep time:  
Cook time:  
Total time:  
Serves: 2
Ingredients
  • ½ cup raw Thai sticky rice (no substitute), soaked for 10 minutes, drained, and rinsed to get rid of excess starch ( I soak my rice for at least 2 hours)
  • ½ cup good coconut milk
  • ½ cup sugar
  • ½ teaspoon salt
  • One perfectly ripe good mango (preferably Ataulfo), peeled and cut into thick slices
Directions
  1. Put the rice in a heatproof bowl and steam in a steamer, over medium heat, for about 20 minutes (based on one half cup of rice). The rice should be cooked through with no hard, raw bits in the middle of the grains. You can also cook the sticky rice without a steamer, using the splatter guard method.
  2. Turn off the heat and let the rice stay in the steamer, with the lid on, while you prepare the coconut milk.
  3. In a heatproof bowl, heat the coconut milk, sugar, and salt in the microwave on high for 2 minutes. The sugar should completely dissolve and the mixture should be very hot.
  4. Take the sticky rice out of the steamer. Pour the hot coconut mixture on top of the rice and gently stir. (It may look like your rice is drowned in coconut water, but the liquid will all be absorbed.) Cover the bowl tightly with plastic wrap and let the mixture stand at room temperature, undisturbed, for half an hour.
  5. The coconut sticky rice is to be served at room temperature along with fresh mango. The sesame seeds are optional.
  6. The rice can be refrigerated and reheated in the microwave, but the texture of reheated sticky rice isn’t as good as it is when freshly made. Freezing sticky rice is not recommended.
It is really best served warm after making it rather than re heated.


Friday, February 15, 2013

Valentine Cupcakes ( Lemon cupcakes)


Cupcakes:

1 box Duncan Hine's lemon supreme cake mix
1 (3.4 oz) box lemon pudding
4 large eggs
1 1/3 C water
1/3 C vegetable oil

Mix all the ingredients together till well combined ( I used a hand mixer). Divide the cake batter among cupcake liners ( I made 18 large ones by filling 3/4 of the liners). Bake at 350• C for 18 minutes.
Remove from oven and cool.

Lemon Buttercream  Frosting

Adapted from C.Taylor at food.com under the title Lemon Buttercream Frosting (From the Famous Sprinkles Cupcakes)

1 lemon zest and juice
2 sticks unsalted butter, softened
3 C powdered sugar
1 tsp vanilla extract
1/8 tsp salt

Combine butter, salt and sugar well. Then add lemon juice, zest and vanilla. Beat till fluffy for about 3 minutes.

Tuesday, December 11, 2012

Lemon Curd

My in laws have a Myer lemon tree and they gave me some beautiful lemons. I was trying to figure out what to do with them and eventually decided to make lemon curd using Ina Garten's delicious lemon curd recipe I found on food network's site. This recipe uses all the zest and the lemon juice so I felt like I am fully using the pretty lemons. Also, I can enjoy the lemon curd in the fridge for a while.

There are many ways to enjoy this delicious spread and many recipes are available on the internet world.

Here are a few of my favorite ways to enjoy lemon curd..
               Over fluffy ricotta pancakes
               Filling inside raspberry or coconut cupcakes
               Spread on a cheesecake
                Make mini lemon tarts
and many more.....

The recipe is as follows:

Prep Time: 20 min   Cook Time:10 min   Level: Easy
Serves: 3 cups

Ingredients

3 lemons
1 1/2 cups sugar
1/4 pound unsalted butter, room temperature
4 extra-large eggs
1/2 cup lemon juice (3 to 4 lemons)
1/8 teaspoon kosher salt

Directions

Using a carrot peeler, remove the zest of 3 lemons, being careful to avoid the white pith. Put the zest in a food processor fitted with the steel blade. Add the sugar and pulse until the zest is very finely minced into the sugar.
Cream the butter and beat in the sugar and lemon mixture. Add the eggs, 1 at a time, and then add the lemon juice and salt. Mix until combined.
Pour the mixture into a 2 quart saucepan and cook over low heat until thickened (about 10 minutes), stirring constantly. The lemon curd will thicken at about 170 degrees F, or just below simmer. Remove from the heat and cool or refrigerate.


I canned mine in mason jars and stored them in the fridge.

Wednesday, September 22, 2010

Daring Cooks September 2010 Challenge: Food Preservation: Apple Butter

The September 2010 Daring Cooks’ challenge was hosted by John of Eat4Fun. John chose to challenge The Daring Cooks to learn about food preservation, mainly in the form of canning and freezing. He challenged everyone to make a recipe and preserve it. John’s source for food preservation information was from The National Center for Home Food Preservation. I had so much fun with this challenge. I made it twice. I gave most of it away to friends and neighbors too!
It's a little time consuming but DELICIOUS!!! I also came up with my own recipe which I was very pleased with. I do want to warn you that this is my own recipe which I am here trying to remember and write down, so forgive me if it is hard to follow and please feel free to email me or leave a comment if you have any questions. Here it is:
9 golden delicious apples
3/4 C apple Juice (and splash lemon juice because I didn't have apple cider)
1 C White sugar
3/4 C Dark corn syrup
1 C Brown sugar
3 Cinnamon sticks
1 TBS cloves
I peeled and cored the apples. Then I chopped them roughly. I placed all the apples, apple juice, lemon juice and the spices in a large pot and let them cook on low till the apples are tender stirring frequently. This took awhile (approximately 2 hours) because I was not only letting the apples cook but also letting all the water evaporate. If you want to strain the liquid out like most recipes calls for, feel free. When all the apples are tender and mashed up to a paste consistency, pick the cinnamon sticks and cloves out and add the sugars and syrup to sweeten and taste. Let it cook to a spread consistency (very thick). Can or freeze. I will not include canning instructions but it is easy to find those online. Good Luck!


Friday, April 2, 2010

Orange Tian- The Daring Bakers March 2010 Challenge


The 2010 March Daring Baker’s challenge was hosted by Jennifer of Chocolate Shavings. She chose Orange Tian as the challenge for this month, a dessert based on a recipe from Alain Ducasse's Cooking School in Paris.

Orange Tian


Preparation time:- Pate Sablee: 20 minutes to make, 30 minutes to rest, 15 minutes to roll out, 20 minutes to bake
- Marmalade: 20 minutes to make, 30 minutes to blanch
- Orange segments: 20 minutes, overnight to sit
- Caramel: 15 minutes, overnight to sit
- Whipped Cream: 15 minutes
- Assembling: 20 minutes
- Freezer to Set: 10 minutes

Equipment required: Cookie cutters. Ideally, you should have about 6 cookie cutters to build the desserts in and cut the circles of dough. The cookie cutters will be the size of your final dessert, so they should be the size of an individually-sized tart mold. If you don’t have round cookie cutters you could use an individually-sized cheesecake mold without its base.
• A food processor (although the dough could be made by hand too)
• A stand-up or hand mixer
• Parchment paper or a silicone sheet
• A baking sheet
• A rolling pin
For the Pate Sablee:


2 medium-sized egg yolks at room temperature
granulated sugar 6 tablespoons + 1 teaspoon; 2.8 oz; 80 grams
vanilla extract ½ teaspoon
Unsalted butter ¼ cup + 3 tablespoons; 3.5 oz; 100 grams ice cold, cubed
Salt 1/3 teaspoon; 2 grams
All-purpose flour 1.5 cup + 2 tablespoons; 7 oz; 200 grams
baking powder 1 teaspoon ; 4 grams

Directions:
Put the flour, baking powder, ice cold cubed butter and salt in a food processor fitted with a steel blade.
In a separate bowl, add the eggs yolks, vanilla extract and sugar and beat with a whisk until the mixture is pale. Pour the egg mixture in the food processor.
Process until the dough just comes together. If you find that the dough is still a little too crumbly to come together, add a couple drops of water and process again to form a homogenous ball of dough. Form into a disc, cover with plastic wrap and leave to rest in the fridge for 30 minutes.
Preheat your oven to 350 degree Fahrenheit.
Roll out the dough onto a lightly floured surface until you obtain a ¼ inch thick circle.
Using your cookie cutter, cut out circles of dough and place on a parchment (or silicone) lined baking sheet. Bake for 20 minutes or until the circles of dough are just golden.

For the Marmalade:

Freshly pressed orange juice ¼ cup + 3 tablespoons; 3.5 oz; 100 grams
1 large orange used to make orange slices
cold water to cook the orange slices
pectin 5 grams
granulated sugar: use the same weight as the weight of orange slices once they are cooked

Finely slice the orange. Place the orange slices in a medium-sized pot filled with cold water. Simmer for about 10 minutes, discard the water, re-fill with cold water and blanch the oranges for another 10 minutes.
Blanch the orange slices 3 times. This process removes the bitterness from the orange peel, so it is essential to use a new batch of cold water every time when you blanch the slices.
Once blanched 3 times, drain the slices and let them cool.
Once they are cool enough to handle, finely mince them (using a knife or a food processor).
Weigh the slices and use the same amount of granulated sugar. If you don’t have a scale, you can place the slices in a cup measurer and use the same amount of sugar.
In a pot over medium heat, add the minced orange slices, the sugar you just weighed, the orange juice and the pectin. Cook until the mixture reaches a jam consistency (10-15 minutes).
Transfer to a bowl, cover with plastic wrap and put in the fridge.


For the Orange Segments:
8 oranges

Cut the oranges into segments over a shallow bowl and make sure to keep the juice. Add the segments to the bowl with the juice.

For the Caramel:

Ingredients U.S. Metric Imperial Instructions for Ingredients
granulated sugar 1 cup; 7 oz; 200 grams
orange juice 1.5 cups + 2 tablespoons; 14 oz; 400 grams

Place the sugar in a pan on medium heat and begin heating it.
Once the sugar starts to bubble and foam, slowly add the orange juice. As soon as the mixture starts boiling, remove from the heat and pour half of the mixture over the orange segments.
Reserve the other half of the caramel mixture in a small bowl — you will use this later to spoon over the finished dessert. When the dessert is assembled and setting in the freezer, heat the kept caramel sauce in a small saucepan over low heat until it thickens and just coats the back of a spoon (about 10 minutes). You can then spoon it over the orange tians.

[Tip: Be very careful when making the caramel — if you have never made caramel before, I would suggest making this step while you don’t have to worry about anything else. Bubbling sugar is extremely, extremely hot, so make sure you have a bowl of ice cold water in the kitchen in case anyone gets burnt!]


For the Whipped Cream:


Ingredients:
heavy whipping cream 1 cup; 7 oz; 200 grams
3 tablespoons of hot water
1 tsp powdered gelatin
1 tablespoon of confectioner's sugar
orange marmalade (see recipe above) 1 tablespoon

In a small bowl, add the gelatin and hot water, stirring well until the gelatin dissolves. Let the gelatin cool to room temperature while you make the whipped cream. Combine the cream in a chilled mixing bowl. Whip the cream using a hand mixer on low speed until the cream starts to thicken for about one minute. Add the confectioner sugar. Increase the speed to medium-high. Whip the cream until the beaters leave visible (but not lasting) trails in the cream, then add the cooled gelatin slowly while beating continuously. Continue whipping until the cream is light and fluffy and forms soft peaks. Transfer the whipped cream to a bowl and fold in the orange marmalade.

[Tip: Use an ice cold bowl to make the whipped cream in. You can do this by putting your mixing bowl, cream and beater in the fridge for 20 minutes prior to whipping the cream.]

Assembling the Dessert:

Make sure you have some room in your freezer. Ideally, you should be able to fit a small baking sheet or tray of desserts to set in the freezer.
Line a small tray or baking sheet with parchment paper or a silicone sheet. Lay out 6 cookie cutters onto the parchment paper/silicone.
Drain the orange segments on a kitchen towel.
Have the marmalade, whipped cream and baked circles of dough ready to use.
Arrange the orange segments at the bottom of each cookie cutter. Make sure the segments all touch either and that there are no gaps. Make sure they fit snuggly and look pretty as they will end up being the top of the dessert. Arrange them as you would sliced apples when making an apple tart.
Once you have neatly arranged one layer of orange segments at the bottom of each cookie cutter, add a couple spoonfuls of whipped cream and gently spread it so that it fills the cookie cutter in an even layer. Leave about 1/4 inch at the top so there is room for dough circle.
Using a butter knife or small spoon, spread a small even layer of orange marmalade on each circle of dough.
Carefully place a circle of dough over each ring (the side of dough covered in marmalade should be the side touching the whipping cream). Gently press on the circle of dough to make sure the dessert is compact.
Place the desserts to set in the freezer to set for 10 minutes.
Using a small knife, gently go around the edges of the cookie cutter to make sure the dessert will be easy to unmold. Gently place your serving plate on top of a dessert (on top of the circle of dough) and turn the plate over. Gently remove the cookie cutter, add a spoonful of caramel sauce and serve immediately.

Monday, February 1, 2010

Chocolate Dipped Strawberries

Well it's the first of February and I have some decent strawberries in my fridge. I figured I'll do something fun and get in the festive (Valentine)mood. I've made these a few years ago before and I remember that it was pretty easy. This month I plan to make a few more romantic items. It's not expensive to make these yourself but buying them is a different story. I saw some at a bakery and they were $3.00 each! Anyway, this cost me about $5.00 and I did it while I was watching a favorite show on TV. It's mainly for my greatest love Ella. She ate a bunch and her face was covered with chocolate.

The hardest part is getting big enough and pretty enough strawberries. Rinsed and dried with paper towel.


Melt some chocolate with a lil cream.


Be sure to wait till your chocolate is melted totally.


I used a tooth pick and dipped the berries in melted chocolate.


Letting the chocolate dry.


So pretty and yummy! (And easy)