Monday, June 21, 2010

Three Spice Liver Pâté -The Daring Cook's June 2010 Challenge


Our hostesses this month, Evelyne of Cheap Ethnic Eatz, and Valerie of a The Chocolate Bunny, chose delicious pate with freshly baked bread as their June Daring Cook’s challenge! They’ve provided us with 4 different pate recipes to choose from and are allowing us to go wild with our homemade bread choice. I chose the Three Spice Livger Pâté and french bread to go with it. The Pâté was easy to make, but I had a hard time getting pork belly to get grinded up in the food processor, so next time I'll chop it up finely first. The house smelled so good when it was baking and my mom couldn't wait to eat. My bread turned out ok but didn't look pretty and I don't have any pictures. Both tasted great, but I made it in a loaf pan I still have a lot left over. Next time I'll halve the recipe. Fun Challenge in deed!


Three Spice Liver Pâté

1 lb / 454 grams pork liver (or beef or combination)
1/2 lb / 227 grams ground pork
1/2 lb / 227 grams pork fat (or pork belly)
2 cloves garlic
2 shallots
1 whole egg and 1 egg yolk
1/2 tsp / 2 ml cinnamon
1/2 tsp / 2 ml coriander (ground or crushed)
1/2 tsp / 2 ml cumin
3/4 tsp / 3 ml salt
1 tbps / 15 ml coarse freshly cracked peppercorns
2 tbps / 30 ml cognac
2 bay leaves
1 package of bacon
Preheat oven to to 350ºF (180ºC).

Cut liver and pork fat into small pieces and add to food processor. Add ground pork, garlic, shallots, cinnamon, cumin, coriander, salt and pepper. Grind until smooth.

In mixing bowl, incorporate the meat and liver mixture with the cognac and eggs.

Line bottom of baking or ceramic pan with overlapping pieces of bacon. Place a bay leaf on the bottom and then fill with meat/liver mixture. Cover top with another bay leaf and then overlapping pieces of bacon.

Place in oven in the larger baking pan and add enough water to cover 2/3rds of the pan containing the meat/liver mixture. Bake for about 1-1.5 hrs.

The pâté will contract and the juices will be on the bottom. Allow to cool and soak up the juices. Remove any excess bacon and discard the bay leaves.

French Baguette
yield: Three 16" baguettes

Starter
1/2 cup / 120 ml cool water
1/16 teaspoon active dry yeast
1 cup / 240 ml flour

Dough
1 tsp / 5 ml active dry yeast
1 cup to 1 1/4 cups / 240 ml to 300 ml lukewarm water*
all of the starter
3 1/2 cups / 840 ml flour
1 1/2 tsp / 7 ml salt

*Use the lesser amount in summer (or in a humid environment), the greater amount in winter (or in a dry climate), and somewhere in between the rest of the year, or if your house is climate controlled.

Make the starter by mixing the yeast with the water, then mixing in the flour to make a soft dough. Cover and let rest at room temperature for about 14 hours; overnight works well. The starter should have risen and become bubbly.

Mix active dry yeast with the water and then combine with the starter, flour, and salt. Mix and knead everything together—by hand, mixer or bread machine set on the dough cycle—till you've made a soft, somewhat smooth dough; it should be cohesive, but the surface may still be a bit rough. Knead for about 5 minutes on speed 2 of a stand mixer.

Place the dough in a lightly greased medium-size bowl, cover the bowl, and let the dough rise for 3 hours, gently deflating it and turning it over after 1 hour, and then again after 2 hours.

Turn the dough out onto a lightly greased work surface. Divide it into three equal pieces. Shape each piece into a rough, slightly flattened oval, cover with greased plastic wrap, and let them rest for 15 minutes.

Working with one piece of dough at a time, fold the dough in half lengthwise, and seal the edges with the heel of your hand. Flatten it slightly, and fold and seal again. With the seam-side down, cup your fingers and gently roll the dough into a 15" log. Place the logs seam-side down onto a lightly greased or parchment-lined sheet pan or pans.

Cover them with a cover or lightly greased plastic wrap, and allow the loaves to rise till they've become very puffy, about 1 1/2 hours. Towards the end of the rising time, preheat your oven to 450ºF (240ºC).

Using a very sharp knife held at about a 45° angle, make three 8" vertical slashes in each baguette. Spritz the baguettes heavily with warm water; this will help them develop a crackly-crisp crust.

Bake the baguettes until they're a very deep golden brown, 25 to 30 minutes. Remove them from the oven and cool on a rack. Or, for the very crispiest baguettes, turn off the oven, crack it open about 2", and allow the baguettes to cool in the oven.

Monday, June 7, 2010

Manila Clams in Blackbean Sauce

I am a seafood lover...especially when they are live and fresh. I found these live Manila clams from my local Asian market today and bought about a pound and a half. The tip for picking good clams is to pick the ones that are completely closed. Also, they should open when they are cooked and the ones that don't open are bad and should not be eaten. Clams can be cooked many different ways but I like clam soup and stir fried clams in blackbean sauce. Here is my easy recipe:

1.5 lb Manila clams
1 TBS finely sliced ginger
1 TBS blackbean sauce, see pic
1/2 C Cooking wine
1 TBS soy sauce
1 TBS oil
1 tsp sugar
1/4-1/2 C water
pinch of salt
green onions for garnish (optional)

Heat up the oil in a wok and add the ginger. After 30 sec or so add the clams and the rest of the ingredients. Stir fry till the clams open. Can cover and steam to cook quicker as well.


Sunday, June 6, 2010

Grilled Scallops with Basil Stuffing

This is one of my newly found favorite seafood recipes. I made this for iheartcookingclubs and I picked this Mark Bittman's recipe for this week's "Herb Garden" theme. We have been cooking with Mark Bittman for sometime now but I havn't had a chance to participate till now. This recipe is so delicious, quick, and easy. I wanted to find larger scallops but these worked out just fine for me. The sweetness of the scallops and the tasty herb stuffing goes so well together and I will be making this again and again. Here is the recipe:

1/2 cup fresh basil leaves
1 clove garlic
1 teaspoon salt
1/4 teaspoon freshly ground black pepper
1/3 cup plus 1 tablespoon extra-virgin olive oil
1 1/2 pounds or more large sea scallops

Mince the basil, garlic, salt and pepper together until very fine, almost a puree (you can do this in a food processor, but it really won't save you time or effort). Mix in a small bowl or cup with 1 tablespoon of the olive oil.

Make a deep horizontal slit in the side of each of the scallops, but don't cut all the way through. Fill each scallop with about ? teaspoon of the basil mixture; close. Pour the remaining oil onto a plate or pan and turn the scallops in it. Let sit while you preheat a gas grill or start a charcoal fire; it should be very hot before grilling, with the rack about 4 inches from the heat source.

Place the scallops on the grill (don't pour the remaining oil over them, as it will catch fire), and grill 2 to 3 minutes per side, no more. Serve immediately, with lemon wedges.


The basil stuffing.


Stuffed scallops.


I did mine in a cast iron skillet on the stove instead of grilling to save time.


Browned and ready to eat scallops.


Delious!!! I was thinking how wonderful this would be if paired with the right wine.....

Saturday, May 29, 2010

Blackened Chicken Pasta with Lemon Cream Sauce

I love pasta with cream sauces and this is one of my favorites! I like Alfredo sauce and order it often when I go out to eat but I like making this lemon sauce at home because it's not as rich as Alfredo and also has lots of flavors from all the vegetables I put in. It is pretty easy to make as well. I will try to write the recipe below with as accurate measurements as I can remember so bare with me for it. Afterall, even if I don't remember the exact measurements, you'll get an idea of what goes in this yummy lemon sauce and a general idea of the steps involved. It'll be fun to taste and add more or less of what you like to make it your own too. So here we go;

Ingredients:

Pasta (I used linguine) Just boil it with a lil olive oil and garlic.

Sauce:

1 medium Onion (chopped)
8 oz Mushrooms (sliced)
1 small Jar of Marinated Artichoke
2 TBS capers
1 TBS flour
2 TBS butter
1/2 C white wine
3 TBS lemon juice ( adjust to your taste)
1 C heavy cream or half and half


Gather your ingredients and cut the mushrooms and onions.


Cook the onions with butter till the are tender.


Add the sliced mushrooms and cook a few min.


Add the flour and mix well for few min.


Add artichokes and capers.


Add wine and lemon juice.


Let it simmer for about 10-15 min.


Lastly, add cream and simmer for about 10 more min. Taste and add more of what you desire ( lemon juice or cream etc)


Easy Blackened Chicken


4 boneless skinless Chicken Breast
4 TBS melted butter
Blackening seasoning

Use any blackening seasoning powder.


Dip chicken in melted butter and sprinkle generously with blackening seasoning.


Fry the chicken up in an cast iron skillet with some melted butter. Make sure the skillet is very hot and you push down on the chicken with a spatula or spoon. Few min on each side.


Ready! Let the chicken sit and cool a lil before slicing and topping on your pasta.


Enjoy!

Thursday, May 27, 2010

Croquembouche (Piece Montée) May 2010 Daring Bakers’ Challenge

Wow! What a challenge this month! I have always wanted to try making cream puffs and/or eclairs and I finally had the chance with this month's Daring Bakers' Challenge. The May 2010 Daring Bakers’ challenge was hosted by Cat of Little Miss Cupcake. Cat challenged everyone to make a piece montée, or croquembouche, based on recipes from Peter Kump’s Baking School in Manhattan and Nick Malgieri. This is definately something that I will make only for very special occasions because of all the multiple steps involved. My daughter turned two the day before the challenge was due so it was a perfect occasion to make such a complicated yet fun desert for her special day. I am happy with the outcome but can't wait to make it again with some adjustments I learned from this first attempt. I think the second one will be prettier and I am looking forward to making it. Here is the recipe:

Ingredients:
Pate a Choux (Yield: About 28)
¾ cup (175 ml.) water
6 Tbsp. (85 g.) unsalted butter
¼ Tsp. salt
1 Tbsp. sugar
1 cup (125 g.) all-purpose flour
4 large eggs

For Egg Wash: 1 egg and pinch of salt

Pre-heat oven to 425◦F/220◦C degrees. Line two baking sheets with parchment paper.

Preparing batter:
Combine water, butter, salt and sugar in a saucepan over medium heat. Bring to a boil and stir occasionally. At boil, remove from heat and sift in the flour, stirring to combine completely.

Return to heat and cook, stirring constantly until the batter dries slightly and begins to pull away from the sides of the pan.
Transfer to a bowl and stir with a wooden spoon 1 minute to cool slightly.

Add 1 egg. The batter will appear loose and shiny.
As you stir, the batter will become dry-looking like lightly buttered mashed potatoes.

It is at this point that you will add in the next egg. Repeat until you have incorporated all the eggs.

Piping:
Transfer batter to a pastry bag fitted with a large open tip (I piped directly from the bag opening without a tip). Pipe choux about 1 inch-part in the baking sheets. Choux should be about 1 inch high about 1 inch wide.

Using a clean finger dipped in hot water, gently press down on any tips that have formed on the top of choux when piping. You want them to retain their ball shape, but be smoothly curved on top.
Brush tops with egg wash (1 egg lightly beaten with pinch of salt).

Baking:
Bake the choux at 425◦F/220◦C degrees until well-puffed and turning lightly golden in color, about 10 minutes.

Lower the temperature to 350◦F/180◦C degrees and continue baking until well-colored and dry, about 15-20 minutes more. (My oven was really hot and I think I over cooked the bottoms a bit with 20 min). Remove to a rack and cool.
Can be stored in a airtight box overnight.


For the Vanilla Crème Patissiere (Half Batch)

1 cup (225 ml.) whole milk
2 Tbsp. cornstarch
6 Tbsp. (100 g.) sugar
1 large egg
2 large egg yolks
2 Tbsp. (30 g.) unsalted butter
1 Tsp. Vanilla

Dissolve cornstarch in ¼ cup of milk. Combine the remaining milk with the sugar in a saucepan; bring to boil; remove from heat.

Beat the whole egg, then the yolks into the cornstarch mixture. Pour 1/3 of boiling milk into the egg mixture, whisking constantly so that the eggs do not begin to cook.

Return the remaining milk to boil. Pour in the hot egg mixture in a stream, continuing whisking.

Continue whisking (this is important – you do not want the eggs to solidify/cook) until the cream thickens and comes to a boil. Remove from heat and beat in the butter and vanilla.


Filling:

When you are ready to assemble your piece montée, using a plain pastry tip, pierce the bottom of each choux. Fill the choux with pastry cream using either the same tip or a star tip, and place on a paper-lined sheet. Choux can be refrigerated briefly at this point while you make your glaze.

Use one of these to top your choux and assemble your piece montée.

Chocolate Glaze:

8 ounces/200 g. finely chopped chocolate (use the finest quality you can afford as the taste will be quite pronounced; I recommend semi-sweet)

Melt chocolate in microwave or double boiler. Stir at regular intervals to avoid burning. Use the best quality chocolate you can afford. Use immediately.

Hard Caramel Glaze:

1 cup (225 g.) sugar
½ teaspoon lemon juice

Combine sugar and lemon juice in a saucepan with a metal kitchen spoon stirring until the sugar resembles wet sand. Place on medium heat; heat without stirring until sugar starts to melt around the sides of the pan and the center begins to smoke. Begin to stir sugar. Continue heating, stirring occasionally until the sugar is a clear, amber color. Remove from heat immediately; place bottom of pan in ice water to stop the cooking. Use immediately.

Assembly of your Piece Montée
:
You may want to lay out your unfilled, unglazed choux in a practice design to get a feel for how to assemble the final dessert. For example, if making a conical shape, trace a circle (no bigger than 8 inches) on a piece of parchment to use as a pattern. Then take some of the larger choux and assemble them in the circle for the bottom layer. Practice seeing which pieces fit together best.

Once you are ready to assemble your piece montée, dip the top of each choux in your glaze (careful it may be still hot!), and start assembling on your cake board/plate/sheet. Continue dipping and adding choux in levels using the glaze to hold them together as you build up.

Monday, May 17, 2010

The Ultimate Beef Wellington

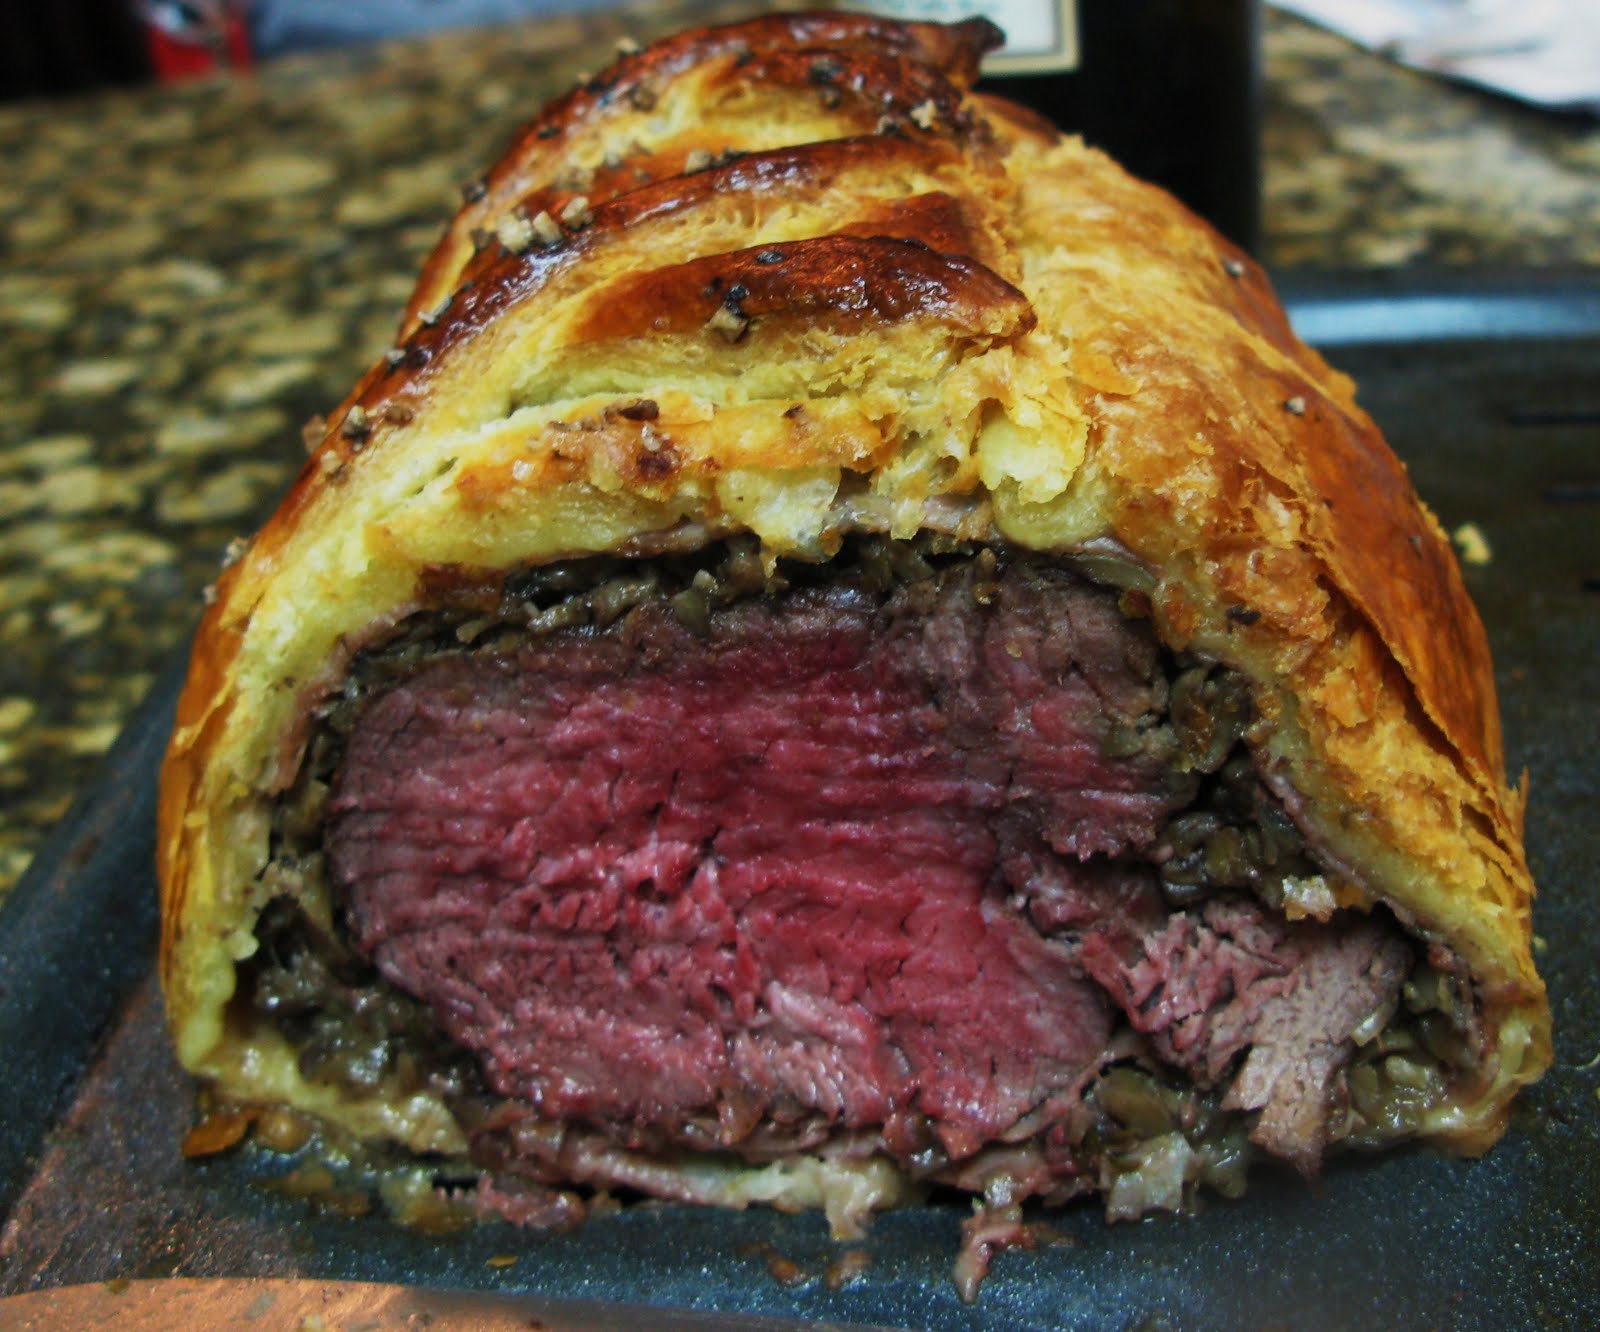
I first heard of beef wellington during one of my many food conversations with my coworkers at work. I didn't know what it was and had my co worker explained it to me. It sounded interesting and I began searching for recipes that sounded good to me. So, I found this delicious Tyler Florence's recipe on food networks' website and decided to give it a try. It was time consuming yet time well spent. Also, this dish can get pricey so I only make it for special occasions such as New Year's Day dinner. This is such a wonderful recipe and I love that prosciutto was used to wrap the beef which keeps the puff pastry from getting really soggy and also add a wonderful salty flavor to the dish. I have had it without as well and would not skip this part since it tastes much better. So let's take a look at how to make this wonderful beef;

Prep Time
: 1 hr 0 min Inactive Prep Time: -- Cook Time: 6 hr 0 min Level:


TIP: There are many videos on youtube how to make this and it is very helpful to watch a few to get the idea if you are making it for the first time.

Intermediate Serves: 6 to 8 servings

Ingredients


For the Duxelles:
3 pints (1 1/2 pounds) white button mushrooms
2 shallots, peeled and roughly chopped
4 cloves garlic, peeled and roughly chopped
2 sprigs fresh thyme, leaves only
2 tablespoons unsalted butter
2 tablespoons extra-virgin olive oil
Kosher salt and freshly ground black pepper
For the Beef:
1 (3-pound) center cut beef tenderloin (filet Mignon), trimmed
Extra-virgin olive oil
Kosher salt and freshly ground black pepper
12 thin slices prosciutto
6 sprigs of fresh thyme, leaves only
2 tablespoons Dijon mustard
Flour, for rolling out puff pastry
1 pound puff pastry, thawed if using frozen
2 large eggs, lightly beaten
1/2 teaspoon coarse sea salt

Directions

To make the Duxelles: Add mushrooms, shallots, garlic, and thyme to a food processor and pulse until finely chopped. Add butter and olive oil to a large saute pan and set over medium heat. Add the shallot and mushroom mixture and saute for 8 to 10 minutes until most of the liquid has evaporated. Season with salt and pepper and set aside to cool.


To prepare the beef: Tie the tenderloin in 4 places so it holds its cylindrical shape while cooking. Drizzle with olive oil, then season with salt and pepper and sear all over, including the ends, in a hot, heavy-based skillet lightly coated with olive oil - about 2 to 3 minutes. Meanwhile set out your prosciutto on a sheet of plastic wrap (plastic needs to be about a foot and a half in length so you can wrap and tie the roast up in it) on top of your cutting board. Shingle the prosciutto so it forms a rectangle that is big enough to encompass the entire filet of beef. Using a rubber spatula cover evenly with a thin layer of duxelles. Season the surface of the duxelles with salt and pepper and sprinkle with fresh thyme leaves. When the beef is seared, remove from heat, cut off twine and smear lightly all over with Dijon mustard. Allow to cool slightly, then roll up in the duxelles covered prosciutto using the plastic wrap to tie it up nice and tight. Tuck in the ends of the prosciutto as you roll to completely encompass the beef. Roll it up tightly in plastic wrap and twist the ends to seal it completely and hold it in a nice log shape. Set in the refrigerator for 30 minutes to ensure it maintains its shape.

Preheat oven to 425 degrees F.

On a lightly floured surface, roll the puff pastry out to about a 1/4-inch thickness. Depending on the size of your sheets you may have to overlap 2 sheets and press them together. Remove beef from refrigerator and cut off plastic. Set the beef in the center of the pastry and fold over the longer sides, brushing with egg wash to seal. Trim ends if necessary then brush with egg wash and fold over to completely seal the beef - saving ends to use as a decoration on top if desired. Top with coarse sea salt. Place the beef seam side down on a baking sheet.

Brush the top of the pastry with egg wash then make a couple of slits in the top of the pastry using the tip of a paring knife - this creates vents that will allow the steam to escape when cooking. Bake for 40 to 45 minutes until pastry is golden brown and beef registers 125 degrees F on an instant-read thermometer. Remove from oven and rest before cutting into thick slices.


Green Peppercorn Sauce: (Optional)
2 tablespoons olive oil
2 shallots, sliced
2 cloves garlic, peeled and smashed
3 sprigs fresh thyme, leaves only
1 cup brandy
1 box beef stock
2 cups cream
2 tablespoons grainy mustard
1/2 cup green peppercorns in brine, drained, brine reserved
Add olive oil to pan after removing beef. Add shallots, garlic, and thyme; saute for 1 to 2 minutes, then, off heat, add brandy and flambe using a long kitchen match. After flame dies down, return to the heat, add stock and reduce by about half. Strain out solids, then add 2 cups cream and mustard. Reduce by half again, then shut off heat and add green peppercorns.

Saturday, May 15, 2010

Stacked Green Chile & Grilled Chicken Enchilada : The Daring Cooks May 2010 Challenge

What better way to celebrate Cinco De Mayo with some homemade Mexican food? It is time for another Daring Cook's Challenge and it is Enchiladas!!!!Our hosts this month, Barbara of Barbara Bakes and Bunnee of Anna+Food have chosen a delicious Stacked Green Chile & Grilled Chicken Enchilada recipe in celebration of Cinco De Mayo! The recipe, featuring a homemade enchilada sauce was found on www.finecooking.com and written by Robb Walsh. Since I am in TX, it was very easy to get all the ingredients needed to make this dish.
I have never made a homemade enchilada sauce and I was sooooo glad I did this month. It was delicious. Please don't get discouraged by the long recipe and steps. it was not difficult at all and worth your time. The hardest part for me was roasting the chilies and tomatillos simply because it is time consuming and have to watch them. The rest is a piece of cake. The only change I made to the recipe is that I boiled a whole chicken and make homemade broth and used the chicken for filling. In my opinion it is moister than grilled but others may prefer the grilled, smoky taste. Whatever float your boat! Changing things up is a big part of the COOKING FUN, isn't it????

Ingredients


1½ pounds Fresh Anaheim chilies (about eight 6 to 8 inch chilies) 24 ounces 678 grams - roast, peel, remove seeds, chop coarsely. Other green chilies (NOT bell peppers) could probably be substituted but be conscious of heat and size!)
7-8 ounces Tomatillos (about 4-5 medium)212 grams - peel, remove stems
4 cups Chicken broth (32 ounces/920 grams)
1 clove Garlic, minced
2 teaspoons yellow onion, minced
1 teaspoon dried oregano
½ tsp Kosher salt (add more to taste)
¼ tsp Black Pepper (add more to taste)
2 tablespoons Cornstarch (dissolve in 2 tablespoons water, for thickening)
Hot sauce, your favorite, optional
2 Boneless chicken breasts (you can also use bone-in chicken breasts or thighs)
3 tablespoons Olive oil or other neutral vegetable oil (use more as needed)
Kosher salt and pepper
12 Small Corn tortillas (5-6 inch/13-15 cm). (you can also use wheat tortillas or other wraps)
6 ounces grated Monterey Jack, 170 grams (other cheeses (cheddar, pepper jack, Mexican cheeses) can be used. Just be sure they melt well and complement the filling)
Cilantro for garnish, chopped and sprinkled optional

Directions:

Roasting Fresh Chilies

1. Coat each chili with a little vegetable oil. If you are doing only a couple chilies, using the gas stove works. For larger batches (as in this recipe), grilling or broiling is faster.
2. Lay the oiled chilies on the grill or baking sheet (line pan with foil for simpler clean-up). Place the grill or broil close to the element, turning the chilies so they char evenly. They should be black and blistered.
3. As they are completely charred (they will probably not all be done at once), remove them to a bowl and cover with plastic, or close up in a paper bag. Let them rest until they are cool.
4. Pull on the stem and the seed core MAY pop out (it rarely does for me). Open the chili and remove the seeds. Turn the chili skin side up and with a paring knife, scrape away the skin. Sometimes it just pulls right off, sometimes you really have to scrape it.
5. DO NOT RINSE! (this will wash off awesome flavors)

Green Chile Sauce

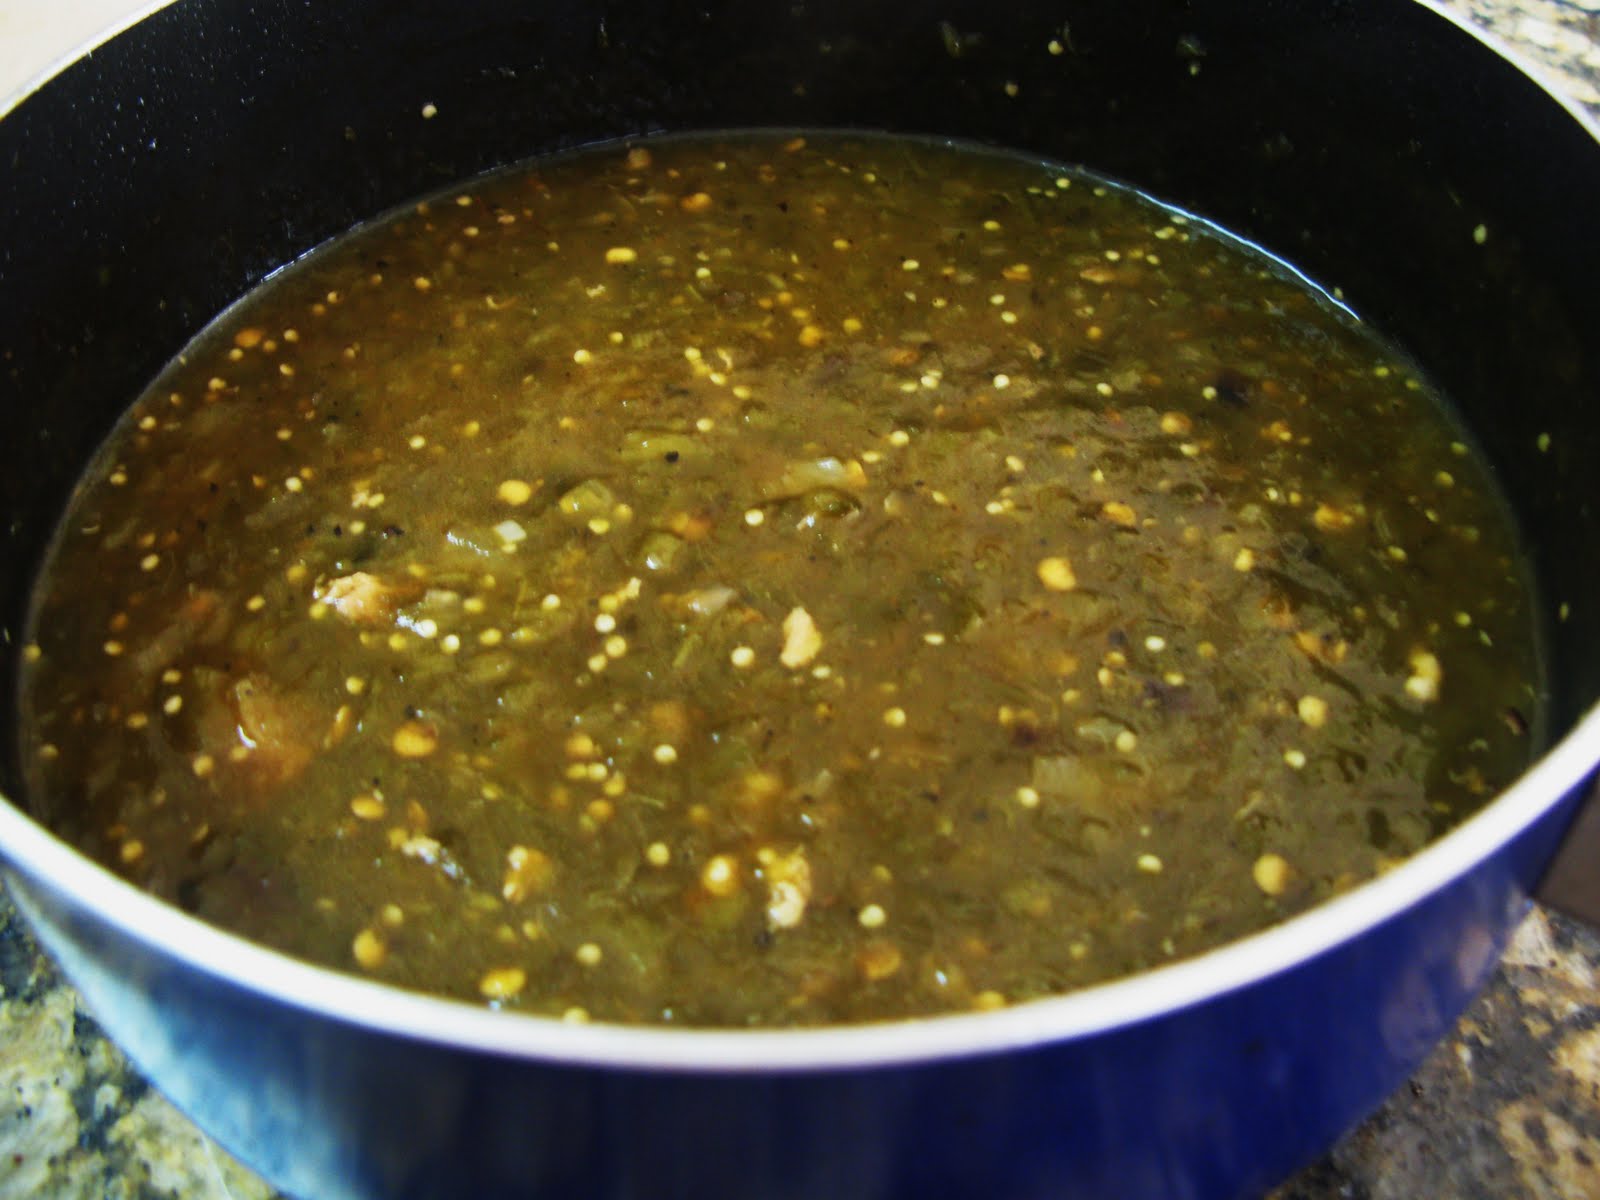
1. Put a medium saucepan of water on to boil and remove the papery outer skin from the tomatillos. Boil the tomatillos until soft, 5 to 10 minutes. You can also grill the tomatillos until soft.
2. Drain and puree in a blender or food processor.
3. Return the tomatillos to the saucepan along with the chicken broth, chopped green chilies, minced onion, oregano, garlic, salt and pepper.
4. Bring to a boil over medium-high heat and then reduce the heat and simmer for 10 minutes.
5. Add the cornstarch/water mixture and stir well. Simmer, stirring occasionally, until the sauce is thickened and reduced to 4-5 cups, another 10-15 minutes.
6. Adjust seasonings and add hot sauce if you want a little more heat.


Stacked Green Chile and Grilled Chicken Enchiladas

1. Heat a gas grill to medium high or build a medium-hot charcoal Coat the chicken with olive oil and season well with salt and pepper. Preheat oven to 450 degrees.
2. Grill the chicken until just cooked through, 4-5 minutes a side for boneless chicken breasts.
3. Cool and then slice into thin strips or shred.
4. In a small skillet, heat 3 tablespoons oil over medium-high heat until very hot. Dip the edge of a tortilla into the oil to check – it should sizzle immediately.
5. Using tongs, put a tortilla into the pan and cook until soft and lightly brown on each side, about 15-20 seconds per side (at the most).
6. Drain on paper towels.
7. Add oil as needed and continue until all 12 tortillas are done.


Note: The directions are for 12 totillas but my pictures will only show a single stack but you will get the idea.


In a baking dish, ladle a thin layer of sauce.


Lay tortillas in the dish and ladle another ½ cup (4 ounces/112 grams) of sauce over the tortillas. Divide half the chicken among the first layer of tortillas.


Top with another ½ cup of sauce.


And 1/3 of the grated cheese.


Stack another tortillas, top with the rest of the chicken, more sauce and another third of the cheese.


Finish with the third tortilla. Top with the remaining sauce and cheese.Bake until the sauce has thickened and the cheese melted, about 20 minutes. Let rest for 5-10 minutes.


. To serve, transfer each stack to a plate. Spoon any leftover sauce over the stacks and sprinkle with cilantro, if you wish. The stacks may also be cooked in individual gratin dishes.